Hello,
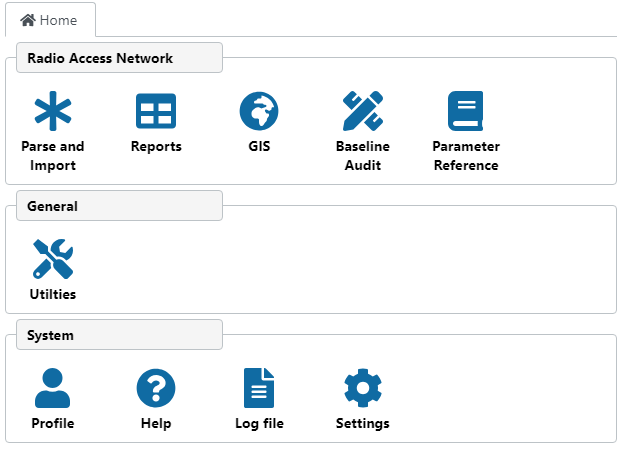
Here you can find a brief description for main Boda Windows and description of each item.
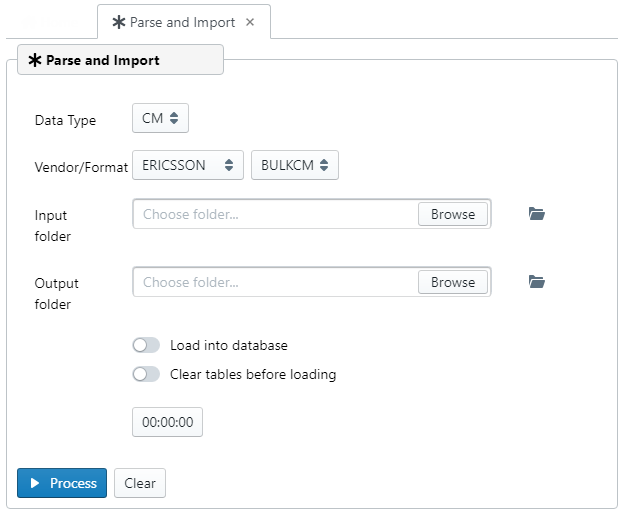
Parse and Import 
-
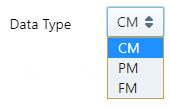
Data Type: select here the data type to be processed.
CM for Configuration Management (Parameters)
PM for Performance Management (Counters)
FM for Fault Management (Alarms)
-
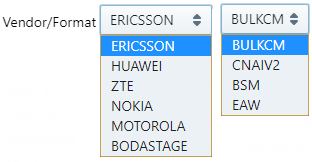
Vendor/Format: select here the Vendor and also the Format of data to be processed.
-
Supported vendors/format:
ERICSSON: BULKCM, CNAIV2, BSM, EAW
HUAWEI: GEXPORT_XML, NBI_XML, CFGMML, AUTOBAK_XML
ZTE: BULKCM, XLS
NOKIA: RAML
MOTOROLA: CELL_X_EXPORT
BODASTAGE: BCF_CSV
-
Input folder: inform the folder where you raw data are stored.
Click on “Choose folder…” or “Browse” button and navigate to the folder where your data to be processed are.
Note: make sure you selected correct Vendor/Format above.
Tip: click the folder icon ( ) to quickly open this folder and view files.

-
Output folder: inform the folder where processed data should be stored.
Click on “Choose folder…” or “Browse” button and navigate to the folder where the output of the parser (processed data) should be stored.
Tip: click the folder icon ( ) to quickly open this folder and view files.

-
Load into database: choose whether or not the processed data should be loaded into database.
Note: of couse this will only work if you have database installed.- If “Load into database” is OFF, the process will only generate the processed csv files, and stop.

- If “Load into database” is ON, the processed data will be loaded into database tables right after the parser finish generating the csv files.

- If “Load into database” is OFF, the process will only generate the processed csv files, and stop.
-
Clear tables before loading: choose whether or not delete all data from database tables, before adding new data.
Note: of couse this will only work if you have database installed.- If “Clear tables before loading” is OFF, new data will be added (appended) to existing tables in database.

- If “Clear tables before loading” is ON, data from all tables will be deleted, and you will have only current data in the tables.

- If “Clear tables before loading” is OFF, new data will be added (appended) to existing tables in database.
-
Timer: a simple timer to indicate progress.

-
Process button: click this button to start the processing of dumps.

-
Clear button: click this button clear the selections, resetting fields.

Settings 
In this tab you can configure settings.

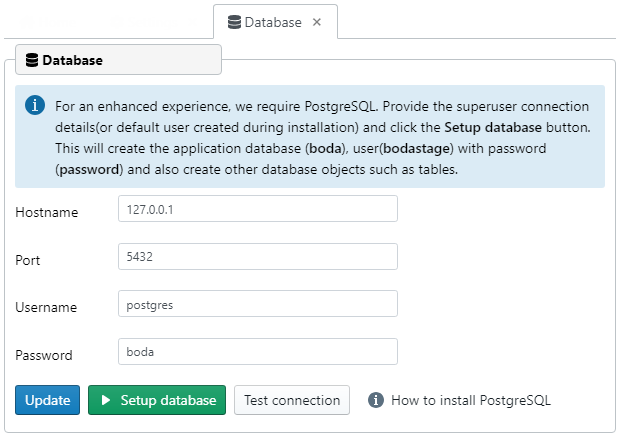
Configure Database Settings:click Database link.
![]()
-
Hostname: the hostname of postgreSQL database.
Default 127.0.0.1

-
Port: the hostname of postgreSQL database.
Default 5432

-
Username: PostgreSQL database user name.
Default postgres

-
Password: PostgreSQL database password.
Default boda (unless you have choosen another password when installing database; in this case, save your own password here).

-
Update button: this button will update above database login info.
Update (saves) Hostname, Port, Username and Password.

-
Setup database button: this button will run database setup.
IMPORTANT: You are required to re-run database setup EVERY time you install a new version, in order to add new tables and fields to database schema.

-
Test Connection button: this button will test connection to database.

- When you click this button and everything is ok you receive a success message:

- When you click this button and everything is ok you receive a success message:
Reports 
GIS 
Utilities 
Log File 
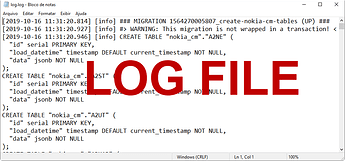
This is a very important section.
The Log file stores information for several tasks.
It records errors and warnings, allowing easy troubleshooting.
Click the Log File button to open the Log as a Text file.
You can save this file, or upload it to get remote support.
