Introduction
We’re really looking forward to start learning Python and Data Science here in telecomHall Community – and yes, we’ll do it soon, together. ![]()
But before we go any further, we just need to make a few observations about the programs we just installed – and if you haven’t already installed, don’t leave it for later – if you postpone it, you won’t be able to do it all at once – and you certainly won’t be able to learn together.
And although the title of this article is “Jupyter versus Pycharm”, let’s not here make a comparison between both, but rather see some concepts related to them and also adjustments in both, which we will do before we start.

So, let’s go?
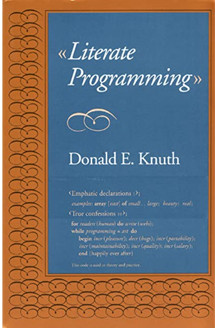
Literate Programming
Codes must be written in such a way as to ensure that they are read and interpreted with ease by us human beings. In other words, give form to the logical units of the code, and also their meanings and of course, the results.
This standard form of programming (that we in the telecomHall community are also adept) was defined by Donald Knuth, a famous Computer Scientist at Stanford.
Tip: Not following this idea is one of the big problems, even of professional programmers – who know that they should write a well-commented text, for example. But for some reason – perhaps the rush – they don’t, end up, after some time afterwards, don’t knowing what the code does anymore, how it works. ![]() If you’re starting out, give a lot of importance to this topic – and we’ll help you by always reinforcing it.
If you’re starting out, give a lot of importance to this topic – and we’ll help you by always reinforcing it.

And it’s exactly this idea that we have with Jupyter: it presents us with the code in a simple way to understand and at the same time complete, with a multitude of tools available.
As we have seen, notebooks (files in which the code is written in Jupyter) have the ability to separate code into “cells”, which facilitate differentiation between specific functionalities.
We have code cells - of course - but we also have markup cells where it is easy to type descriptions of code, meaning or results. The editing options of markup cells are endless, allowing you to use imagination to work with text formats, images and even mathematical equations and diagrams.
And that’s one of the reasons that has made Jupyter one of the mandatory programs for those who want to work with Data Science.
But it doesn’t have as many features as professional programmers do. Developers found it much easier to create, run, and debug source code while examining its outputs simultaneously in a single place.
And that’s where IDE come in, and as we’ve seen, PyCharm is the one we’re going to use – because it’s one of the most powerful. (But you can use others, no issues).
Below we’ll see some tips for you who are starting to use Jupyter and/or PyCharm be able to easily follow the upcoming tutorials.
Opening ipynb files
Most Python code editors save the file in the same format, with the “.py” extension.
But when we installed Jupyter, we saw that it has another extension, the “ipynb” – as we saw in the Jupyter installation tutorial (formerly known as IPython Notebook).
Then the question arises: if I am using an IDE (like PyCharm), can I open an “ipynb” file of Jupyter normally?
The direct answer is, they can do it. But it’s not that simple, so let’s look at two ways to do that.
Changing Jupyter working directory
But first, let’s see one tip that may be useful.
When you installed Jupyter, you saw that the default folders are presented as your computer folders – Documents, Downloads, etc. This because Jupyter default working directory is C:\Users\MYUSER - where MYUSER is your Windows user (in our case is “telec”).
But you can change this to another location.
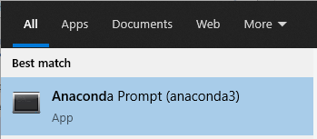
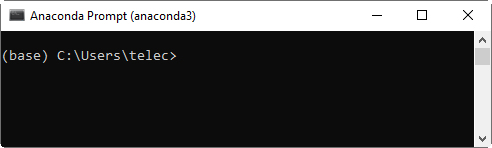
One option is to use The Anaconda Prompt (Type “Anaconda Prompt” in the taskbar to open).
And see that it also opens in the default directory (in our case, “C:\Users\telec”).
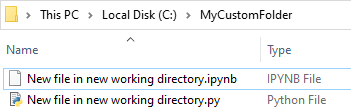
But let’s imagine that you want to work with files in another location, for example “C:\MyCustomFolder”.
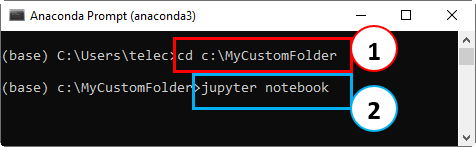
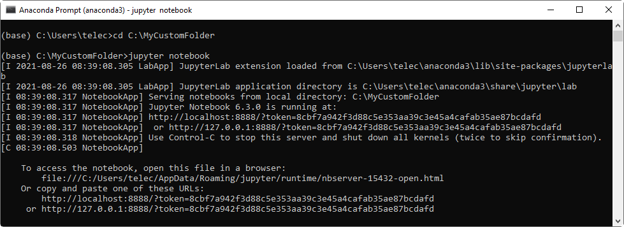
The first option is to navigate in the Anaconda Prompt to the directory you want to work with (1), and type “jupyter notebook” (2). Jupyter will open at this new location.
> cd YourCustomFolder
> jupyter notebook
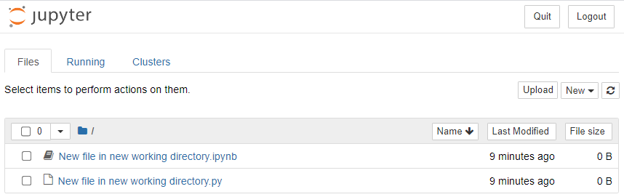
And then you can work normally using your desired directory!
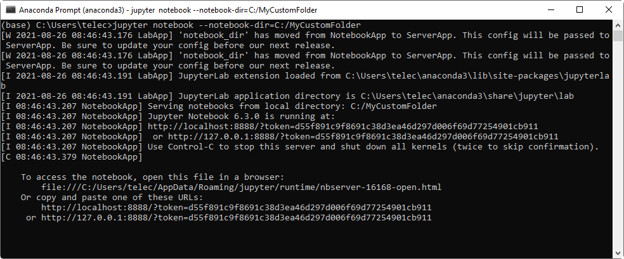
Another option is to use the “–notebook-dir” option. Directly typing the command in Anaconda Prompt (without having to navigate to the desired folder beforehand – because it will be on the command line):
> jupyter notebook –notebook-dir=C:/MyCustomFolder

In any of the options you can use Jupyter in another (wanted) Working Directory! ![]()
Exporting file." py"
Now imagine that you have Python code in Jupyter, and you need to open this code in PyCharm – or some other IDE, such as VSCode.
The version we use from PyCharm (free, community) does not open juypter files directly, so the solution is:
• Open the file (“ipynb”) using Jupyter
• Export the file with Python format (“py”)
o Menu File (1) → Download as (2) → Python (. py) (3)
• Open the file (“py”) directly in PyCharm
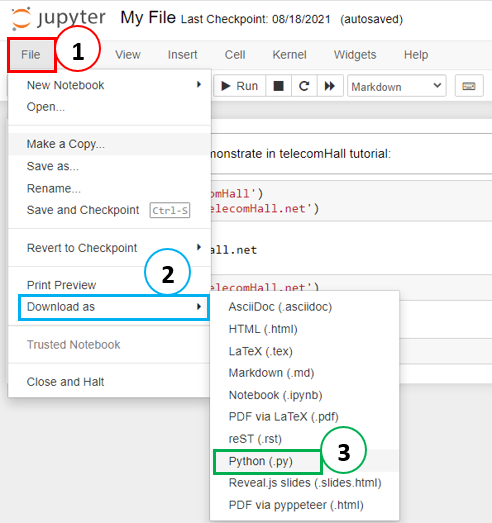
This is the simple way to open your Jupyter file with Python codes in PyCharm.
Installing Jupyter on PyCharm
PyCharm has extensive support for integrating jupyter notebook. To do this, simply “install” Jupyter on PyCharm.
This would be the ideal option, because we are able to extract all the advantages of both programs in one place.
And why isn’t it recommended here? Simply because this option is not part of the free version of PyCharm – which is the one we use. Additionally, you may not currently want to work this way or do not have the resources to subscribe to the paid version of PyCharm.
But there’s no problem –here at telecomHall we’ll follow with the free version, community edition – and you can follow in the same way. ![]()
But it’s good to know, that if you prefer, you can use the paid professional version and install Jupyter. Installations in PyCharm are very simple, and we’ll see how to do this soon.
Let’s continue.
Changing PyCharm theme
Concluding today’s tutorial, we’ll do an important customization in PyCharm - which will make it easier to read the next tutorials.
You must have followed with the standard installation of PyCharm, and when it opens, the theme (also standard) is dark – more precisely the theme “Darcula”.
Tip: The interface theme defines the appearance of windows, dialogs, buttons, and all UI visuals. But it’s not the same as the “color scheme”, which defines colors, fonts, and syntax highlighting for various text features: source code, search results, and so on. You can customize this regardless of the chosen theme – and we’ll see how to do later.
The theme, in any tool is a decision of who uses - in this case, you! ![]() But in our case, as we will show many images of the codes, examples etc. of everything we are doing with PyCharm, we prefer to use a clearer theme.
But in our case, as we will show many images of the codes, examples etc. of everything we are doing with PyCharm, we prefer to use a clearer theme.
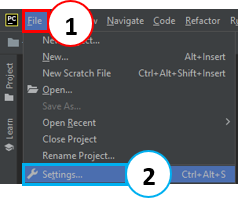
To change the theme, we go to the File Menu (1) → Settings… (2).
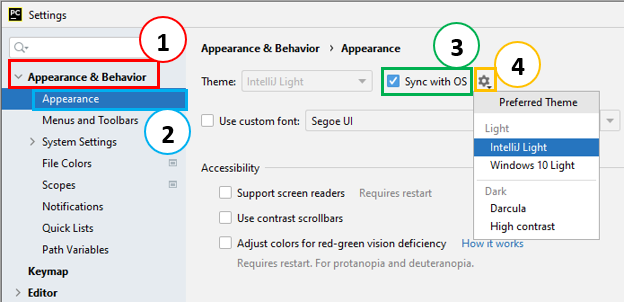
Navigate to Appearence & Behavior (1) → Appearance (2) and select for “Sync to OS” (3) to sync with the operating system – PyCharm detects current system settings and uses the default dark or light theme accordingly (in our case, the OS has the light theme). But you can choose any other theme you prefer (4).
So from this moment on, all the images you’ll see will have the theme clear. For example, if you print the tutorial, you won’t use all the printer ink. ![]()
Now yes, let’s keep going and see how to use Jupyter on PyCharm.
Download
Today’s tutorial does not require any files.
Conclusion
After today’s tutorial you learned a little more about the programs we will use to write code and create solutions in Python.
We recommend that you are all set and take the time to ask questions related to the installation and these first basic steps, because from the next tutorial on we will teach step by step how to do everything with Python!
Install everything, ask your questions (or simply add any comment below to show you are following along), and we’ll meet in the next tutorial. ![]()
Index
Back to main index: Data Science by telecomHall Community
