Introduction
Frequency Planning and Neighbor List Verification are two major tasks required to ensure an efficiently Optimized Network.
This analysis can be done in several ways, and one of them is by checking geo-referenced plots, where possible problems of ‘Interference’ or ‘Missing Neighbors’ can be easily identified.
Google Earth is a good place for this type of inspection, but Mapinfo also has its advantages - especially in terms of interactivity (eg it is easier to create an event when a user clicks a cell in Mapinfo than in Google Earth) .
And as we said in previous tutorials, MapInfo has a programming language - Mapbasic - which allows you to create compiled files (‘MBX’ type), which can be run as programs in Mapinfo.
The application that we show today is one of these files (MBX). The code (MB) as always will be available for Hunter Users. And today’s tutorial will be a little different - will be more focused on the utilization of the Tool, as a little ‘Help File’.
We’ll show how to use the tool based on simple examples of analysis, even for you that is NOT a Hunter User - you can download the MBX and modify input files (‘CSV’) to use on your own network!
So here we go.

Input Data
The input data of the tool is basically a MapInfo Table file (‘.TAB’) with info for the network data, organized by row - each row has data for each specific cell.
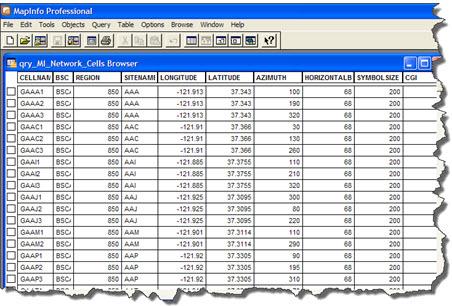
In the previous tutorial we show how to automatically obtain this file using Hunter System with - for example fetching data from the ‘Database’ with the daily ‘dump’ of system configuration parameters (BCCH, BSIC, etc. .. .) and also the Physical ‘Database’ (Latitude, Longitude, Azimuth …).
This automatic generation is interesting because the data are already available in a format that Mapinfo reads, or are ready to be opened and used.
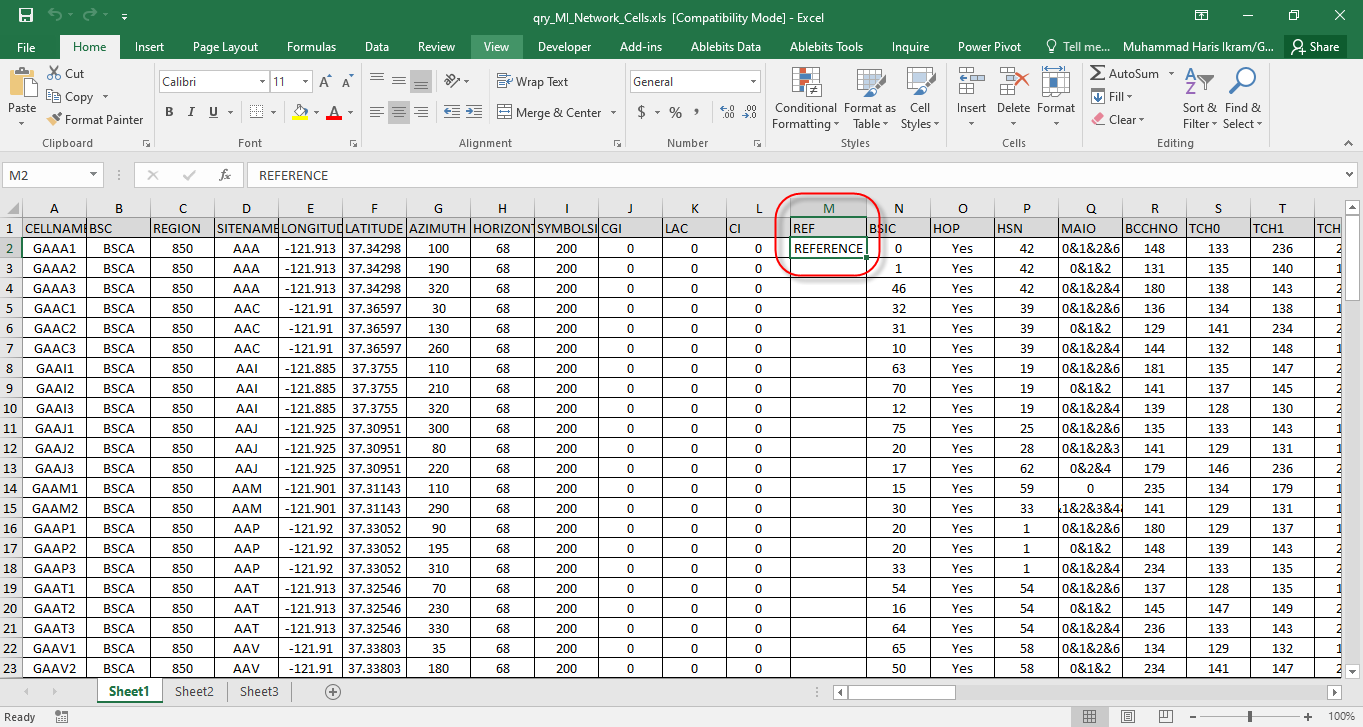
But it is possible to reach the same result by hand - from an Excel table with the necessary data.
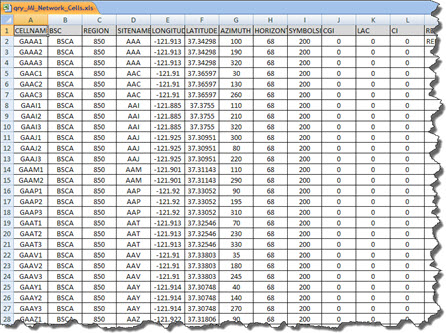
So if you do want to use the tool this way, first create an Excel spreadsheet with the data as a spreadsheet in this example (available for download).
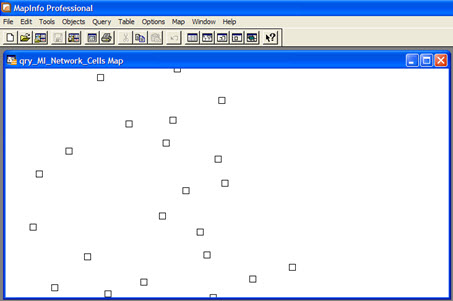
Then open the spreadsheet in MapInfo, and Create Points for it (using ‘X’ as ‘LONGITUDE’ and ‘Y’ as ‘LATITUDE’). This is a procedure that we have shown in several other tutorials, and you should be familiar.
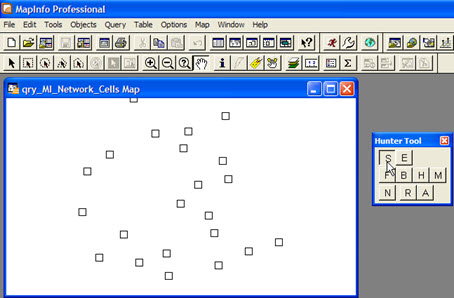
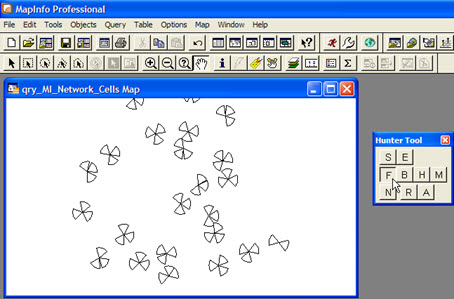
After creating the points, you can include a map window as shown below. (Also we have shown how to do this).
Okay, now you can use the tool. So here we go.
Interface
The interface is a Standard Taskbar (‘Hunter Tool’), with buttons for each specific type of action.
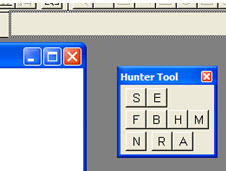
‘Create Symbols’
The first action to do is to Create Symbols for the cells. To do this, click the ‘S’ button.
After clicking, appears the ‘Edit Symbol’ dialog box.
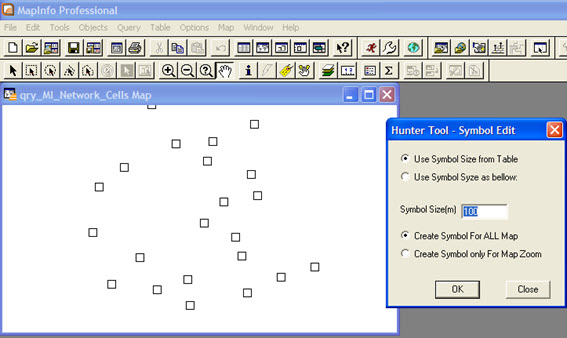
After clicking ‘OK’ symbols are generated for the cells. The action is slightly different according to the selected values in ‘checkboxes’.
The first two define the Symbol Size:
- ‘Use Symbol Size from Table’: causes the size of the symbols be as defined in the original table (in our case, 200 meters).
- ‘Use the bellow Size Symbol: Symbol Size (m)’: use the value of the textbox to lenght of symbols.
The last two checkboxes define the area (Zoom) where the symbols should be created / modified:
- ‘Create Map Symbol For ALL’: creates the symbols - the size according to previous selections - for the Entire Map.
- 'Create Symbol only For Map Zoom ': creates the symbols for the Current Zoom only.
Regardless of the combination, the symbols will be created.
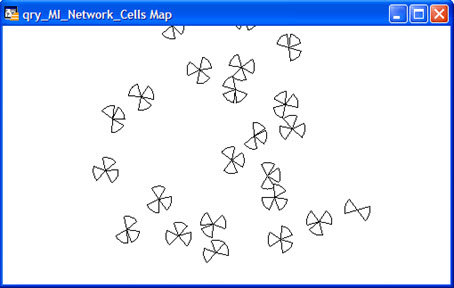
Now we can do the analysis.
Legend
First, however, is very important to have the Legend available for the thematic maps that will be presented.
You can use the button 'Show/Hide Legend’button at ‘Main’ Taskbar.
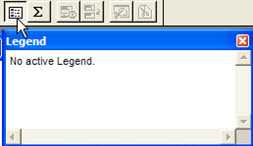
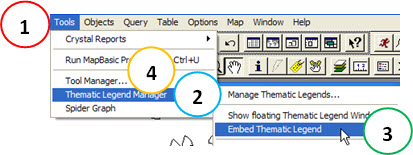
But a recommended way to show the Legend is embed it in the map. To do this, open the menu ‘Tools’ (1) → ‘Thematic Legend Manager’ (2) → ‘Embed Thematic Legend’ (3). Note: If you do not have this menu appear in MapInfo, open ‘Tool Manager’ menu (4), locate and enable the ‘Legend Manager’.
‘View Frequencies’
The next action is far more interesting: ‘View Frequencies’. To do this, click the ‘F’ button.
The more natural action n ow is to click on a given cell.
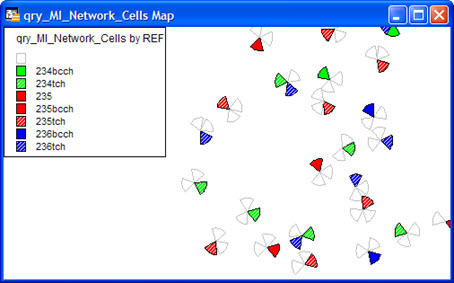
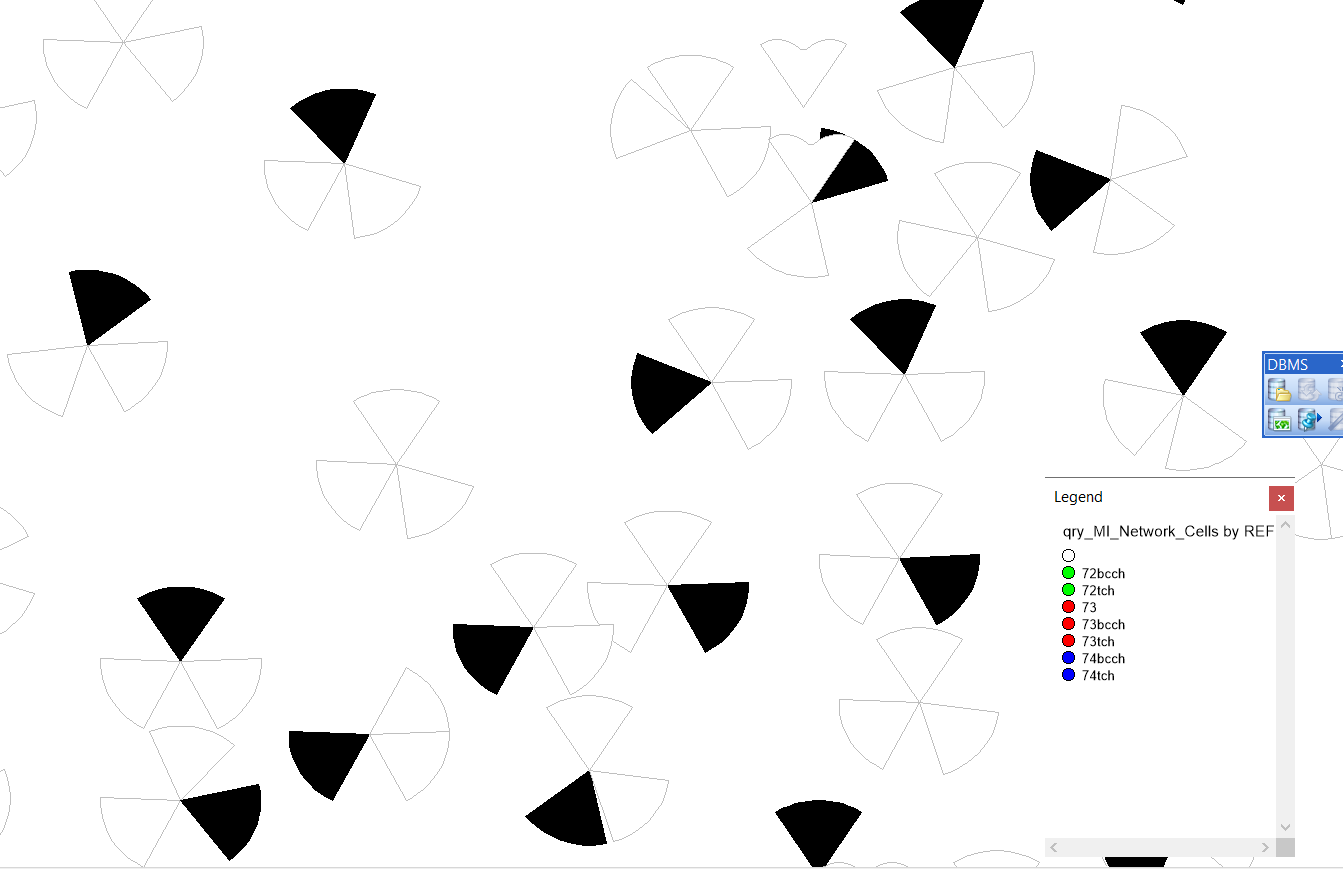
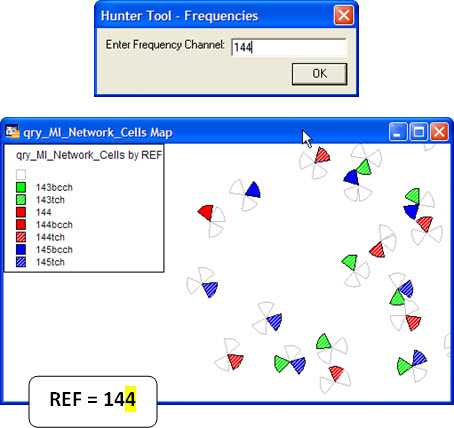
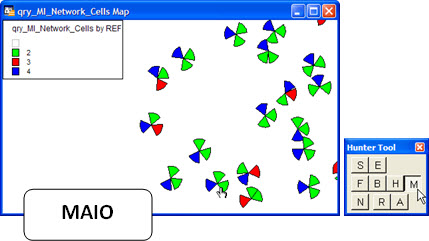
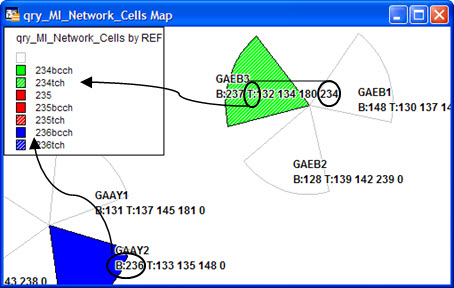
The Reference Frequency (‘REF’) - the cell that you’ve clicked - is in the color Red. On the same map, we can see the ‘CO-CHANNEL’ (also in Red), and the ‘ADJ-CHANNELS’ Down (Green) and Up (Blue).
If the channel is being used as ‘BCCH’, the symbol is solid - ‘Solid Color’. If it is being used with ‘TCH’, the symbol is ‘hatched’.
When we click anywhere else on the map (1) other than a cell, a new dialog box appears, and then we can then insert a specific Frequency to view.
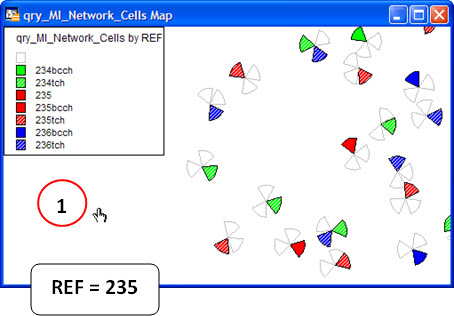
Entering a new frequency, a new thematic map is generated.
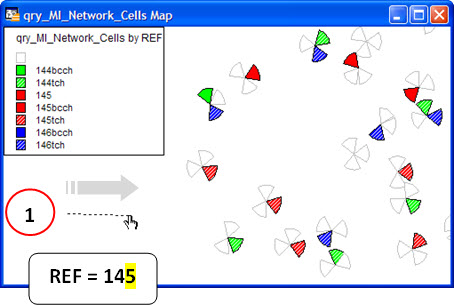
Another way to change the Reference Frequency (“REF”), is to move the mouse (1) to the Right - increment ‘+1’ in the current ‘Frequency Reference’ and Left - decrement ‘-1’.
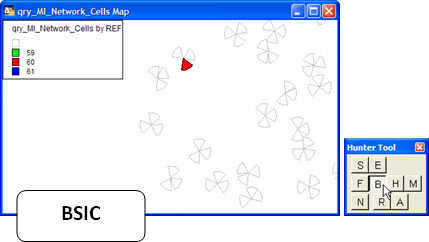
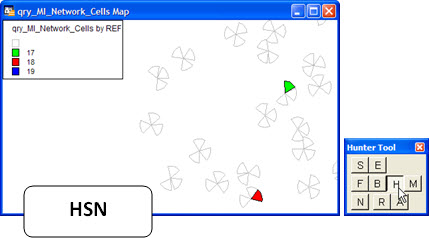
‘View BSIC, HSN and MAIO’
The same actions shown for Frequencies (BCCH/TCH) are applied also to other parameters: BSIC, HSN and MAIO. For this, we use the corresponding buttons ‘B’, ‘H’ and ‘M’.
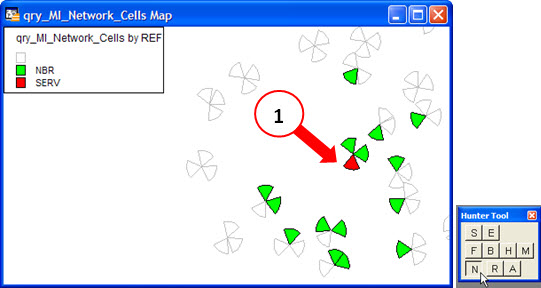
‘View Neighbors’
A ‘Neighbor List’ Fine Adjust is one of the most important requirements for a better overall network performance. It is crucial that the neighbor is correctly declared, otherwise we will certainly have Dropped Calls.
Clicking the ‘N’, and then clicking on any cell (1), you have a quick check of how they are declared. In ‘Red’ the ‘Server’ cell, and in ‘Green’ it’s declared neighbors.
‘Add / Remove Neighbors’
To Add or Remove Neighbors, click the server cell, and drag the mouse pointer to the desired new Neighbor.
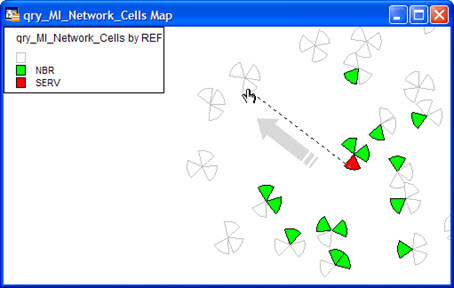
If the target cell is already declared (Green) it is ‘Removed’ (turns White). If it is not declared, it is ‘Added’ (and is to appear as Green) (1).
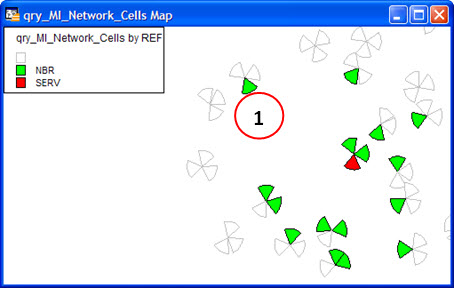
A good use for this action is to adjust its ‘Neighbor List’ by checking critical cases where natural or even obvious (eg cells near and pointing at each other) neighbors are not declared.
After making the necessary adjustments, you can export the table in the format ‘CSV’ (for example), and work with data in Excel or Access. It can also be used as a reference for creating scripts to update the OSS’s data. Or at least for a more thorough check, for example by evaluating handover counters.
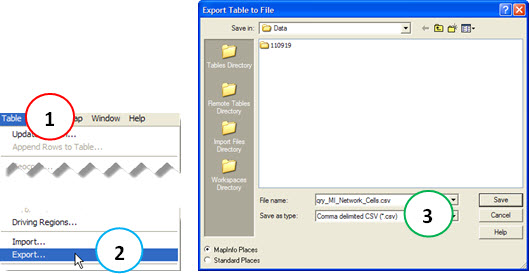
To export the table, in Mpainfo open the Menu: ‘Table’ (1) → ‘Export …’ (2). In the dialog box ‘Save As’, choose the format ‘CSV’ (3).
The new ‘Neighbor List’ can be checked in the exported file.

Note: It is clear that the tool can be used for this, but there are other Hunter Modules that do it better and faster, we’ll see it soon. And even other that do this work so much more practical, for example the Hunter Module that do ‘Neighbors Audit’ as always built in Access / VBA. There are still other Modules - also to be published soon - that cover the Frequencies Analysis and ‘Neighbor List’ in Google Earth.
Anyway, the tool represents an excellent support for quick investigations of network configuration, especially in point analysis and to attend an occasional customer complaint.
Edit in Mapinfo
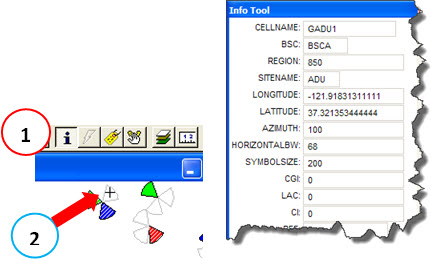
Note that you can continue using all functions of Mapinfo normally. For example, by accessing the ‘Info’ button at ‘Main’ Taskbar, you can inspect all information for a cell.
You can also Insert/Remove ‘Labels’, as you normally do (1).
A tip here is to use ‘Expressions’, according to your needs to display.
For example, using the following expression:
CELLNAME + Chr$(13) +“B:”+BCCHNO+" T:"+TCH0 + " " +TCH1 + " " +TCH2 + " " +TCH3 + " " +TCH4
We have a visualization as follows.
‘Edit Cells’
Anyway, we have a dialog box on the tool that allows us to make minor edits to the working table - and consequently in our thematic maps. It is the action "Edit Cells’, accessed through ‘E’ button.
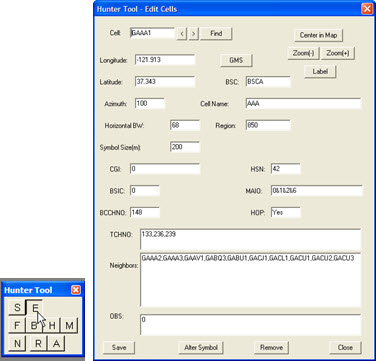
The editing options are not the main purpose of the tool, but serves as an extra help, especially in some localization tasks, or quick editing.
For example, you can type the name of your cell, and click the ‘Find’. Then, by clicking the ‘Center in Map’ it is centered on your screen.
Another good use is to check the efficiency of a particular change. For example, you can make a retuning of a BCCH to a new Frequency, and then see how the new scenario becomes.
And you can also change the size of the symbol of a particular cell by clicking the ‘Change Symbol’.
You can remove a cell, by clicking the ‘Remove’ button. And also ‘Show/Hide’ Labels from the map simply by clicking the ‘Label’ button.
And you can also ‘Insert’ a new cell. For this purpose, choose any cell - preferably whose data come closest that you will create - edit the text of the first text box ‘Cell:’. Then click the ‘Save’. The new cell will be created with the new name assigned, and with all data from the previous cell.
But as we speak, the editing options are just helpers.
Registering the Tool
If you are not a Hunter User, and consequently does not receive any codes (VBA, Mapbasic, etc. ..) you can use the Tool anyway. In the file available for download, you will find the compiled file ('MBX), and also an example file in Excel with data from the network.
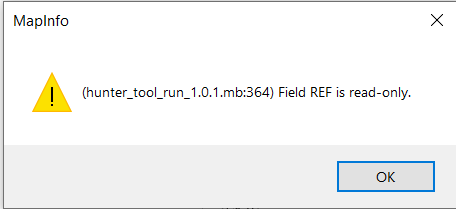
When you run it, a screen appears telling you how to proceed to ‘Register’ for Free.
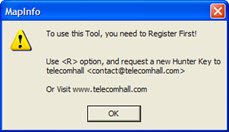
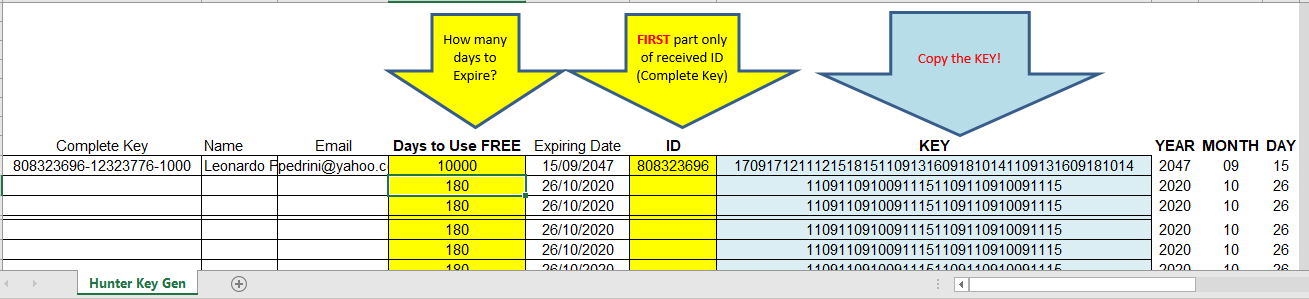
Click the OK button, and click the ‘R’ button (1). At ‘Registration’ Screen, select and copy the number ‘Request ID Number’ (2). Then send it via email to telecomhall (2).
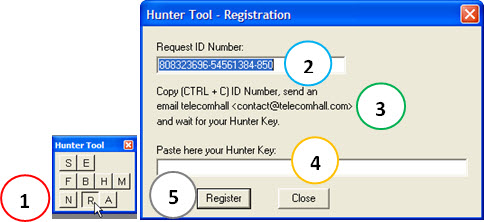
Once we receive your request, we’ll send you Free Registration Code (‘Hunter Key’). Just paste that received key in the location (4), and click ‘Register’ (5).
So that’s it. We are done for today.
A lot of new modules is ready to be published, involving numerous software you already own and know (Microsoft Office - Access, Excel, Outlook … MapInfo, Google Earth, AutoIt, among others).
In addition, the Telecom and IT tips are still regularly published. And soon we’ll return with the publication of ‘Course Style’ Tutorials, explaining important points in a simplified way for you to have a better understanding of Telecom.
So be sure to continue reading, and best, practicing so you can follow our progress productively. Stacking inevitably lose big tips. Remember that here we care more about teaching and share with you everything that you can use to achieve success in your work, it is only up to you and anyone else can do it fo you.
Conclusion
Today we saw another ‘Hunter Module’, now a very interesting tool for quick analysis of the GSM Frequency Plan and also to check the Neighbors List.
These points are very important in Optimization, and consequently to the Network Performance.
Comments and Support
If you have any question about the tool (any questions, suggestion, request and so on), please comment below.
And of course: If you developed (extended) the module to have more functions, please post your new/modified tool here also.
Download
To download files from this tutorial:
Download Source Code:
Blog_032_Hunter_Mapbasic_Tool_GSMFrequencyPlanAndNeighborsAnalisys.zip (89.6 KB)
Download Key Generator:
Blog_032_HunterKeyGen_New120813.zip (93.7 KB)
Note: The Hunter SDK is a set of tools designed and demonstrated in telecomHall - including Macros and Codes.