Introduction
In the previous tutorial, we had our first contact with Mapinfo and Mapbasic. We had a brief introduction to Mapinfo, and also how to use Mapbasic - your programming language without having Mapbasic installed. Although soon we will see a series of programs Mapbasic, today we will take the opportunity and not let us use the Mapbasic itself, through the interface of your program. Alternatively, we learn a new concept that can be learned and that we also use a lot, not only with the MapInfo: automation, handling or other applications using VBA
Purpose
From the information of the data from our network, plot the data for Sites and Sectors in Mapinfo, just as we did in the previous tutorial. This time, however, do everything without even opening the MapInfo (at least manually).
File Structure
As the structure of the module MI Hunter Network has been created earlier, no new directories to be created - our directory structure is already created.
Manipulating other programs Automation
may seem complicated, but it is not. Through the VBA can open, make changes and close other programs. Let’s see and use enough of this functionality, for example, to create charts in Excel spreadsheets from a database.
And what are the benefits? Well, this will become clearer later. Anyway, let’s try to realize these benefits through an example.
We have data from our network at our table in the database Network. We saw what commands Mapbasic / Mapinfo we need to use as CreatePoints () and CreateLines (). Then, using a single code, we create the tables and Sites.TAB Sectors.TAB for Mapinfo. In other words, let’s take a single click and build our network in Mapinfo
The manual way to do is open the MapInfo, open each data tables - Sites and Sectors, create the points for each one, creating the object field georeferenced, and in the case of sectors, creating the lines. Save and Close. By doing this, then we have the tables you want.
And the code is the same way - only that we need not do anything manually
We’ll see then how?
Mapinfo Files
Before learning how to do via code, we know what we create. When you see a DOC file type, you know that is a type of file that contains text, and can be opened by Microsoft Word is not it? Well, the MapInfo has a number of file types, and we must be familiar with them.
-
TAB : basic file type, define a table in MapInfo.
-
MAP : type of file that contains the coordinates of the data.
-
DAT : file type with the attributes of data.
-
ID : A file type of content that contains the links between the MAP file objects and attributes of the DAT file.
As you might imagine, for each file we TAB files corresponding MAP, DAT and ID. In the case of Sites: Sites.TAB, Sites.DAT, and Sites.MAP Sites.ID.
Note: All files only work together. Ie no point in having just the TAB file and delete one of them: you can not open the data in Mapinfo. Likewise, if you send someone, remember to send all.
There are other file types that the MapInfo reads / uses (such as IND), but we’ll see just those for now.
Let’s finish talking just a file type that we saw briefly earlier - the type Workspace.
- WOR : file type desktop, which saves the information of the location of tables and maps open.
It is important that you save all tables and maps that you handle before leaving the Mapinfo, even if you save the Workspace. That’s because if you delete the Workspace does not imply any loss of data, because the tables that were used unchanged. But maps, charts, layouts and the like will be lost if not saved individually. But do not worry, if any table is not saved when you close the Mapinfo, it will ask you through a dialog box, and then you decide whether to save or not.
Generating our archives by VBA
Viewed concepts, let’s jump into the action and see how the files are generated from the previous tutorial, but now automatically
The code is fully commented, and you can follow the same.
The first important action is to create an object of Mapinfo (more or less as if we carried the Mapinfo program in memory!). For this, use the CreateObject function, as below.

After this command is executed, the MapInfo is already in memory. From now on, using the syntax objMapinfo.Do can execute any command in MapInfo.
In this case, the first thing we do is mount the strSQLCreateTable string with the syntax to create the table according to the data we wish it had. And execute the code.

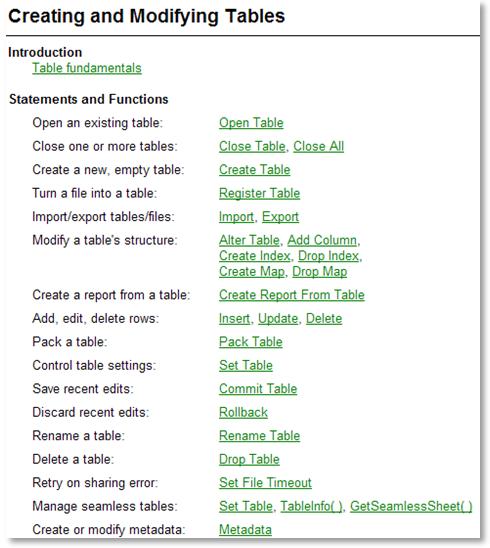
Note: For reference of the syntax of each of these commands, we can consult the help file Mapbasic, as shown below. If you do not already have installed and is not Mapbasic Subscriber, you can easily find these using Google syntax. For each of the command syntax is shown, and also an example for easy understanding.
After execute this command, our TAB file is created. The file type TAB can be opened with any text editor such as Notepad.
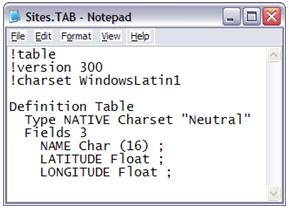
It has also been automatically created the DAT file, blank. Although we can also use Notepad to view the data the same, it is not editable.

Note that so far we created the table but not the data. Therefore, through a Recordset Access - a concept we’ve seen before - assembled the strSQLInsertINTO string containing the data of each record in our table and insert the table you just created in Mapinfo, running the code below.

After traveling throughout the recordset and inserting all the data in the table in Mapinfo, our DAT file is complete. As mentioned earlier, you can see that it has data but not edit.

With the open table, we are now creating the points. To do this, we set the string strSQLCreatePoints with the proper syntax and run the code.

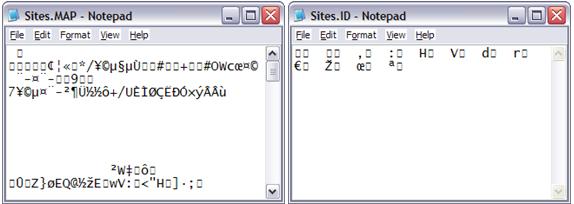
After the points have been created, we now have the files of type MAP and the type ID. These can also be viewed by Notepad, showing that they have data, but you can not do anything else with it.
Finally, save and close to our table. For this, we use the commands Commit Table and Close Table of Mapbasic.

Note: the above command string strFileName containing the name of our table (Sites at the time).
For the case of the Sites table, work is already done. Now Sectors for the table, the process is virtually the same. We have one more command to create the sectors.
Thus, if the table Sectors, we set the string strSQLCreateLines and performed as shown below.

Finally, we close the object Mapinfo.

Workspace
As soon as we saw in the previous tutorial, the file type Desktop (WOR) contains information on our desktop, as the location of the tables. It is easier to understand that if we open it using Notepad.
Right-click the file Mapinfo_Network.wor located in Data folder of this module (MI Network) and select Open With … Notepad.
All properties of the Workspace can be previewed, and are quite intuitive.
Featured in time for the lines that begin with Open Table (1). These lines indicate which tables must be opened. Note that we have no way here because we save the desktop in the same directory where the tables. If any of the tables are located somewhere else, the full path will appear. (Eg move the Sites table “Sites.tab” to the root of C:).
justify;">
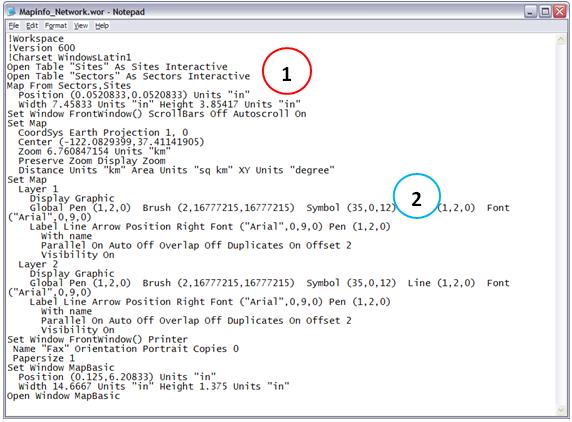
Note that the Workspace defines the properties of all elements using syntax such as Global Pen (1,2,0) Brush (2,16777215,16777215) Symbol (35 , 0.12, etc.). In this case, are the default properties of each element, saved simply because this desktop in the previous tutorial, without making any changes.
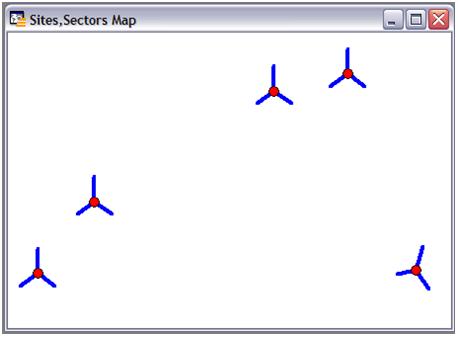
So let’s do the following: Open the two tables - the first open table Sectors and then the Sites table, and make some changes through the program interface to see how it Mapinfo our new Desktop.
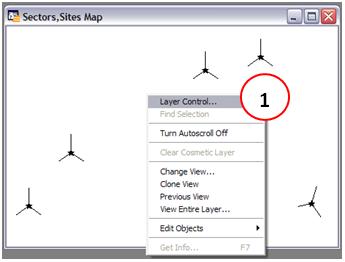
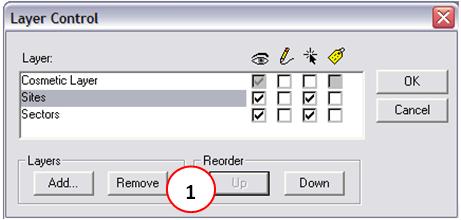
First, let’s change the standard symbol of sites to a small circle filled with blue. Right click on the Map, and choose Control Layer (1).
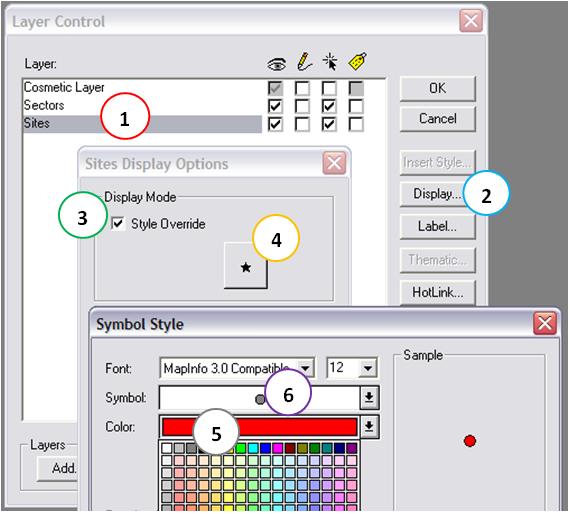
In the Windows Control Layers, we change the symbol of a circle to sites filled with the color Red. So first select the layer (1), click on Display (2), check Override Style (3) and click the button with a star (4). Colour choice Red (5), Symbol and select the circle (6). To finish, click the OK button of each open window. Just do not even click on the OK button the window of the Control Layer.
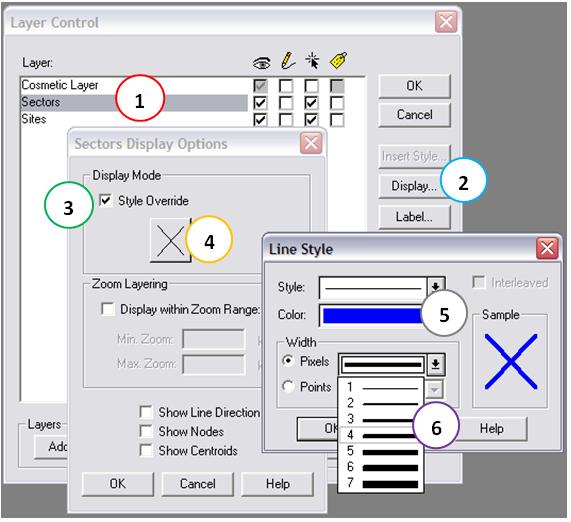
Then, still in the Layer Control window, let’s change the Line of Sectors for the blue color and thickness to 4. So first select the layer (1), click on Display (2), check Override Style (3) and click the button with an X (4). In choosing the color Blue (5) and thickness (6) fourth choice.
To finish, click OK in each open window, including the Layer Control window, just because our issues.
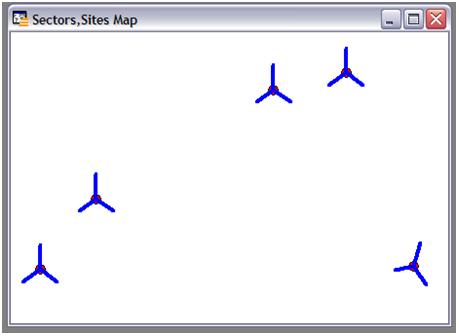
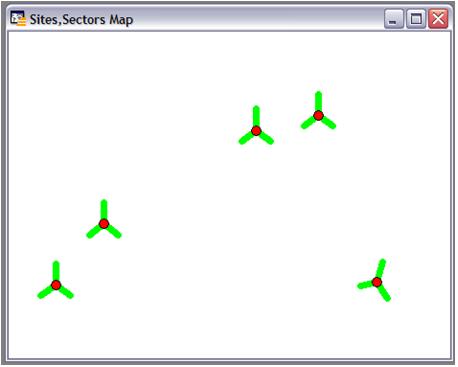
The result is then shown below.
Only one detail: as we open the table first and then the table Sectors Sites, this is the order in which the layers appeared. So just to finish, select the layer and click the Sites button above (1), making it appear first. Tip: You can also drag the layer above.
Yes, now see how much more presentable to our desktop.
To complete this item on the desktop in Mapinfo, save this new Desktop Hunter_MI_Network.wor as in the Data directory for this module.
Open this file with Notepad, and notice the differences. See how they were before the default attributes: Global Pen (1,2,0) Brush (2,16777215,16777215) Symbol (35,0,12) Line (1,2,0) font (“Arial”, 0,9,0).
For the Sites, we change the standard symbol for a circle (34) Red (16,711,680).
-
Original: Symbol (35,0,12)
-
New: Symbol ( 34 , 16,711,680 , 12)
For Sectors we changed the standard line for a Blue Line (255) Thickness 4 (4).
-
Original: Line (1,2,0)
-
New: Line ( 4 , 2, 255 )
Finally, the changes we made on the desktop were recorded in the file WOR. We can edit this file - once we know exactly what we’re doing - and get the same result. As an example, open the WOR with Notepad, and change the sentence Line (4,2,255) to Line (7,2,65280). See the results.
Conclusion
In this tutorial we learn that we can reference other programs through the VBA and run our amendments. In the case, using the concepts of the previous tutorial, we create two tables Mapinfo through data stored in our Access table, and create points for a (Sites) and lines for other sectors (Sectors). This automation will be used in other tutorials, and presents several advantages, such as generating output data with virtually no intervention.
We also met some new concepts of Mapinfo, and learned that the files of type Workspace can be edited using a text editor such as Notepad.
Although this particular case the automation of the Access-Mapinfo has been sufficient, the use of programs compiled with Mapbasic are also very important, especially when working with data using the interface Mapinfo . These executable programs Mapbasic will be seen shortly.
Hope you enjoyed. Ask any questions posting your comments in the blog or via our Support via Chat or Email.
Until our next meeting and remember: Your success is our success!
Download
Download Source Code: Blog_007_Hunter_Mapinfo_Network_VBA_Automation.zip (27.4 KB)