Introduction
It’s a fact and nobody can deny today’s extreme importance of Google and the tools that are part of it. And one of these tools is Google Earth, a really great help to our area of Telecom and IT, although it is used for numerous other applications. But generally people use only a small part of its potential, as individual users. However, knowing a few secrets, you will stand out easily.
Purpose
From the information of latitude and longitude, automatically generate a file that can be opened by Google Earth, showing the the sites.
Before proceeding, we suggest reading our tip post about Google Earth:
You will learn how to download, install and most importantly, meet some interesting ideas about this powerful application from Google.
File Structure
As usual, we need to create the folders where to put the files that we’ll use.
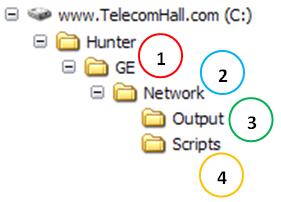
(1) Create the directory GE, just below the main directory Hunter, previously created. Note: The directory GE actually be the root directory of a series of tools that develop with Google Earth, as plots of drive tests, etc..
(2) Create the Network directory underneath the directory GE, which is the root of our module (GE Network).
(3) Set the Output directory: where are the output files from this module.
(4) Create the Scripts directory: local storage of scripts in this module.
Note: If you are a subscriber, simply detach the files received to the location. A quick way is to detach the ZIP file in your computer’s root directory ( “C:") and then click Right-click the file and choose” Extract here …". When asked whether to overwrite files that may exist in the Hunter (which already exists!), Answer yes. Done!
Our structure now looks like this:
We are ready to begin.
You can program using a simple text editor!
In this module we have our first contact with programming. Just to show that programming can be simple and efficient, we do a program without using a programming tool!
And now here is a very important concept: nearly everything can be done, there are no limits, and when they appear, soon someone will pass them!
One way to reach a goal - in our case we generate a file that can be read by Google Earth - is doing a reverse engineering (mind you, just the name is ugly ). In our case, we will open Google Earth, add a placemark and generate the output file normally through the tool. Next, let’s see what the data needs to be in that file and better, how to change it.
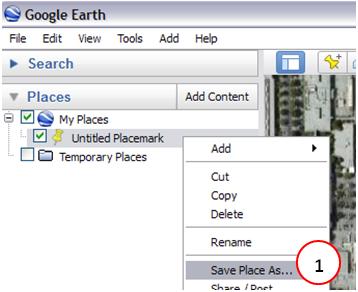
Then, open Google Earth, add a marker (1) and click the OK button (2).

Then right click and select the bookmark Save Place as (1).
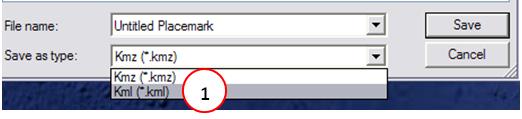
Save this file in any folder, but choose type KML (1) instead of KMZ.
Now, using Windows Explorer, right click on that file and choose Open With … (1).
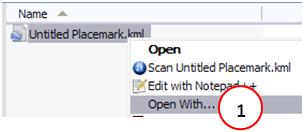
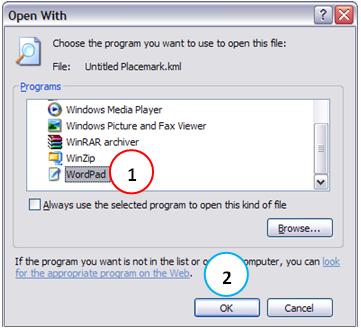
In the window that appears, select the WordPad (1) and click the OK button (2). We can use Notepad, but is easier to see in WordPad.
Locate the text block below in this file. The label name is defined by the text between the tags (1). The latitude, longitude and altitude of the point are defined by the values that are between the tags (2).
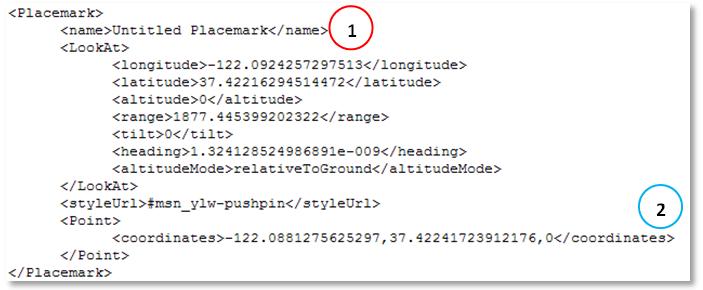
Change the default name from the name tags for Untitled Placemark for telecomHall!, and save the file.
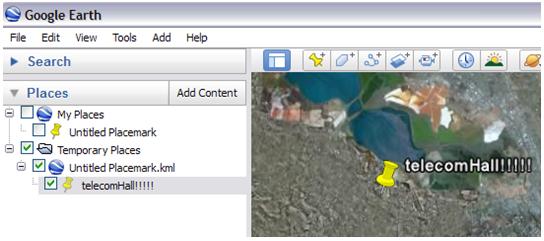
Now, reopen this file by double clicking in Windows Explorer or through Google Earth interface. Clear or delete your original marker. See the results.
This was a very simple example, and of course we will not be changing our data using our hands, this simple procedure you seen how you can easily create your own files in Google Earth.
In short, understanding the structure of the KML file can create - through codes or even in hand as we did - what you can do using the program. As we will see over time, we will create powerful applications that will help us greatly in our analysis.
Let’s start today by plotting our data from our network, stored in the module tbl_Network Hunter Network, directly to Google Earth.
Some new concepts: Linked Table
We have the data from our network - table tbl_Network module Hunter Network. We already know the file format we need to create or generate. So now we just need to see how to create a file in this format using Access. In due course we will see how to generate with other programs such as Excel.
The first thing to consider would be to create a macro inside the Hunter_Network_DB.mdb database, which contains our table to generate the data. We could even do that. But over time, and with new and different applications developed, would be very difficult to organize because each one is able to contain a specific set of queries, tables, macros, etc.
It is also interesting to create a culture of client x server, ie the database Hunter_Network_DBc ontains only data, and another file is created as the client that will access the data in our repository.
For this, first create a new Access file with the name GE_Network_1.0_RUN.mdb within the Scripts folder of the module Hunter GE Network.
Then that file will actually be our client application to generate the data to Google Earth, make a link to the table of our database Hunter_Network_DB.
By creating a linked table, the source of our data for this (and other applications) is always unique. It is like a local table that we can open, make queries on their data, etc … But it will be easier when we see in practice.
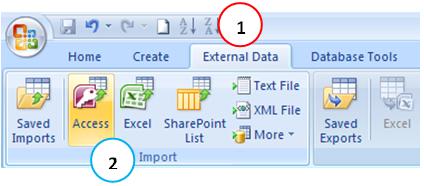
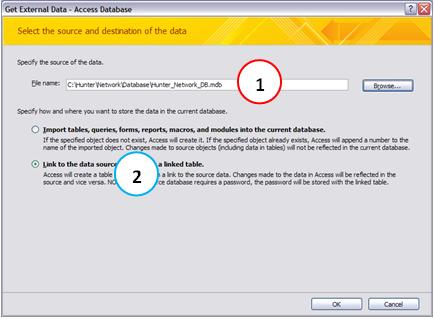
Open the file that will be our client application (a blank database in Access). Select the External Data menu (1) → Access (2).
In the new window, click the browse button and point to the database Hunter_Network_DB.mdb (1). Check the Link to data source, create a linked table (2).
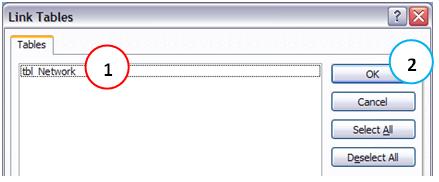
A new window will open with the objects of our database. Currently, we only have our table tbl_Network. Select the table (1) and click the OK button (2).
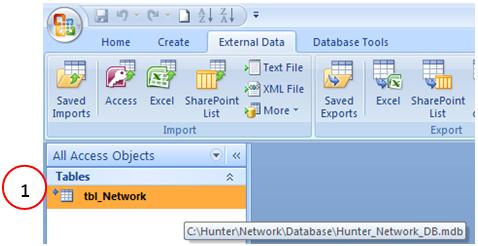
Note that we now have a table with a small arrow stating that it is a linked table (1).
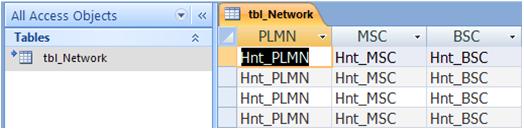
Double-click this table and see that you have access to data, and can use it the same way we use directly in the original database.
Note: we can link data from various sources, including databases, SQL or Oracle. And once linked to, any database table becomes like an Access table. Thus, in future we will see how to create applications that access and use data from other applications.
New Concepts: Recordset!
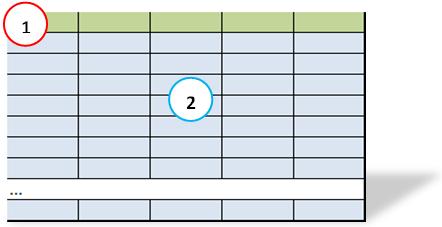
To generate the output file with data that are on our table, we need to access the data programmatically. And for this we use the Recordset object. A Recordset is a data structure that consists of a group of records from the database, and can come from a base table or a query result. Understand the Recordset as table or query that an object is temporarily stored in memory, containing the fields (1) and records (2), as shown below.
This concept is common to multiple platforms, and in our case is known as Data Access Objects (DAO) and ActiveX Data Objects (ADO). The Recordset object contains a collection of fields and properties, and anytime we can refer to them.
Note: do not worry if it was not clear now. Although we talk a lot of recordsets, and you can see their potential in practice.
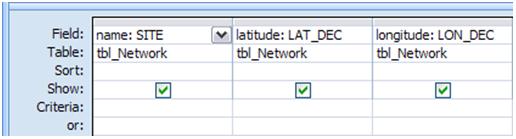
Now let’s continue, and create a new query qry_GE_Network_Sites containing the required fields SITE - for the bookmark name, and the fields LAT_DEC and LON_DEC, with latitude and longitude of the same .
Here, one information. We could use this query with the field names as are on the table. But we can and will change the name of the same, simply to facilitate the matching of the same when access these fields via code. Anyway, it’s just for the sake of standardization that we use. (We will see another opportunity like this standardization also helps in the homogenization of data when we have several tables from different sources, with different names for the same fields).
Thus, the query, enter each field before the new name that we use, followed by “:”. We respectively have name:SITE, latitude:LAT_DEC and longitude:LON_DEC.
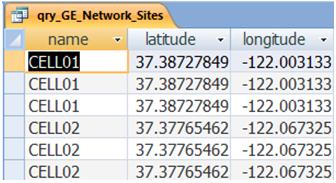
Run this query and see the data. Note that now the field names of this query are almost as we want. We say almost because the query generates repeated data. As each site has three sectors, three lines are repeated (even though the sectors are not being shown). It is as if our table in Excel, just off from the other columns, leaving only the columns SITE, LAT_DEC and LON_DEC.
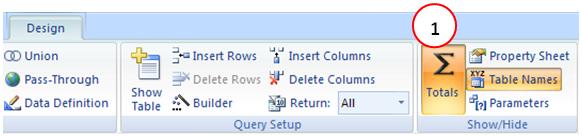
To resolve this problem - eliminate duplicate records from the output of our query - simply Group the output data by clicking Totals, the summation button (1).
Now yes, our query is ready, and we can generate the output file via code.

VBA Programming Environment - Access Modules
Before creating the code, let’s talk a little about VBA, or Visual Basic for Applications. If you never had contact with any language, even an Excel macro, you may not be completely clear now, but rest assured: it is not as complicated as it sounds! If you can not follow what we wrote here, ask for assistance from our support.
Why we use VBA? Well, is already available in Office would be a sufficient response. But VBA is a very simple language to be understood, and at the same time very powerful. You can perform many different tasks that you currently can not imagine. Over time, we will use and learning more and more.
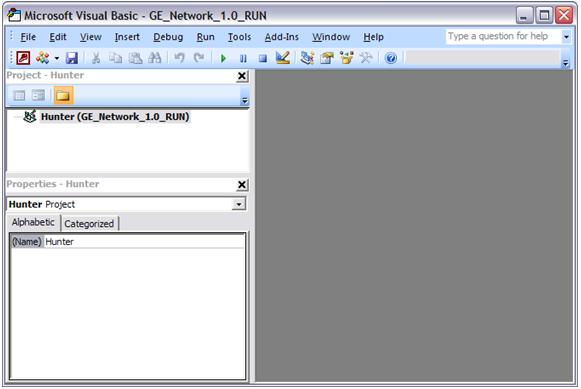
To begin, let’s open the Programming Environment. To do this, access the Tools Database (1) → Visual Basic (2). A shortcut to this environment are the keys ALT + F11, and you can use it if you prefer.

The Visual Basic Environment (VBE) will open as shown below. When you use the VBA in any other program, eg Excel, the interface is the same.
Let’s not talk about the environment itself, since we are not a programming course. Come to the point, and create our first module to start programming.
But what is a Access Module? A module is a way to store code or code groups. We store here properties and methods. Properties or variables are what we use to temporarily store values, and methods are the actions that must be made. These actions vaiáveis and use the stored values. Okay, the language began to complicate matters, let’s talk about other options other time.
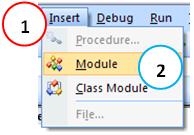
Stopping the conversation, we will insert a module! Go to the Insert Menu (1) → Module (2).
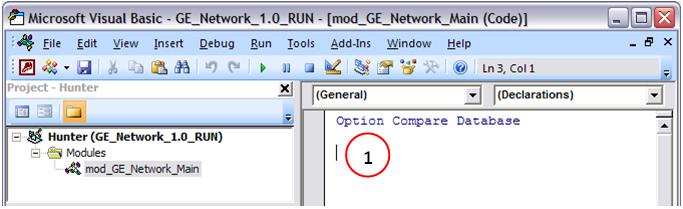
Save the module with the name mod_GE_Network_Main accessing the menu File → Save GE_Network_1.0_RUN or simply clicking the disk icon on the toolbar.
Okay, we are prepared to write code (1) that will access the data from our table - through a query - and create our archive.
Creating the code
Here would be interesting to talk about Sub routines and functions, and also on the Declaration of Variables, Debug, etc.. However, we would escape a little of our goal today, and we have seen too much when you are new to programming. Not a course in Excel, Access or programming’d come all this information at once. So let’s continue and talk about this later.
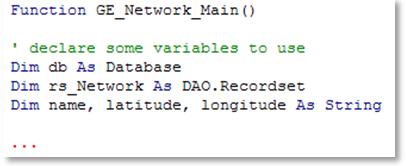
Only know for now that our code will reside in a Function so that we can call it later through the main interface of Access, and has the following form:
GE_Network_Main Function ()
End Function
Everything we write between these two lines represents the actions that we want to be done.
The complete code to create our archive is available in the ZIP file sent to subscribers.
All code is commented, and we suggest that you read it. That’s right: you can read the code as a task list: do this, then do that, etc..
Running code
Finally, let’s see how to run the code, calling the function through the main interface of Access. For this, we use a macro. (The concept of macro in Access as we have said is a little different from Excel. In Access, macros perform pre-defined actions). Another time we will teach you how to debug (what is this ?!?), run the code step by step, etc.. As we said, for newbies it seem too ugly words, so we’ll talk about it another time.
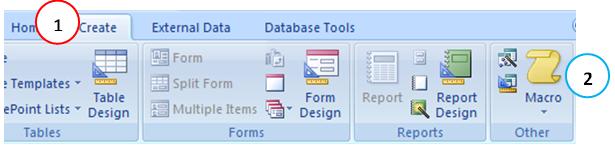
To create a macro that will call our function and generate the file, go to the Create Menu (1) → Macro (2).
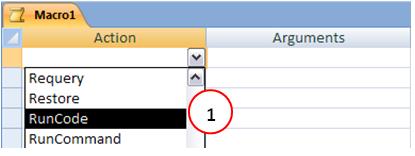
In the new window, choose the action RunCode (1).
Then in the Action Arguments, type the name of our function GE_Network_Main () (1).

Save the macro by clicking the disk icon next to the Office’s button, named GE_Network_Main_RUN.
Finish! Double-click on the macro created: our file was created in the output of our module (C:\Hunter\GE\Network\Output).
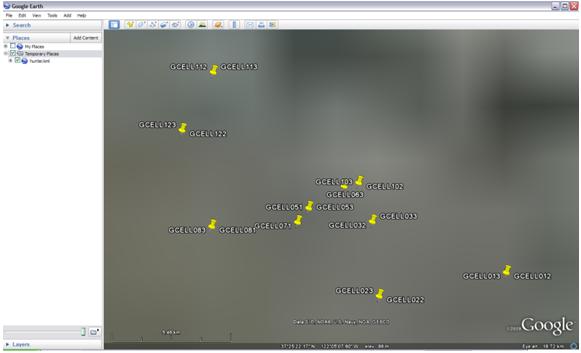
Open the file created, and see how the sites in our network were plotted on Google Earth.
Conclusion
With this lesson we learn how to use code in Access, and through it to generate a file in Google Earth with data from our network, stored in our table.
Hope you enjoyed. Take any doubts posting your comments in the blog or via our Support via Chat or E-mail.
Till our next meeting, and remember: Your success is our success !
Download
Download Source Code: Blog_003_Hunter_GE_Network_(Sites).zip (18.6 KB)