I am not sure if this exactly what you’re asking, but let me share here a very nice tip for all you that use inserted images in Excel.
It solved my problem of inserted image in an RFP, where some images was needed in some cells. ![]()
If we do not do some “adjusts”, image will be floating… and often end up messing all the visualization for example when you filter or resize cells (rows and/or columns). ![]()
In short, after inserting any image in Excel, you should:
-
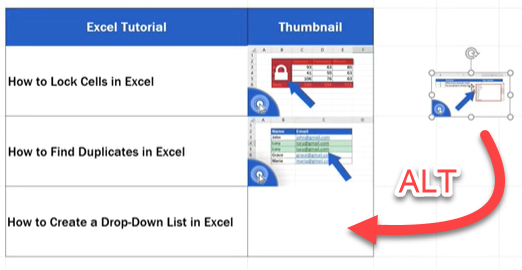
Drag image with ALT key pressed
-
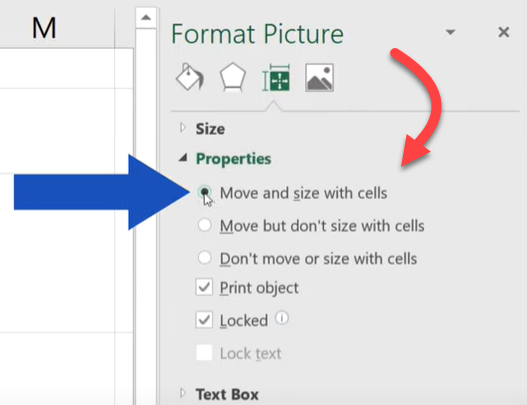
Set Image Properties to “Move and size with cells”
That’s it. Now you can filter and resize your cells, and the behavior will be exactly like text inside each cell.
I hope you liked the tip.
If you need more details / support, please inform, or… you can what the original (source) video with this nice tip: https://www.youtube.com/watch?v=_lv7r8JVxW8
*In this video tutorial, you’ll learn how to insert an image in an Excel cell, in the right way. *
*Each image inserted in the Excel sheet will be placed nice and neat within its target cell. *
*In addition, we’ll learn to set the right formatting, so that the image could move and change size along with the cell. *
This comes quite handy when you need to hide or filter rows or you’re planning some further operations with the row or cell that contains the inserted the image.