Introduction
The Drive Test is an excellent way to evaluate network, and we also talked here in telecomHall about some tips and best practices to perform it.
As we have seen, it can be used in several areas. Today we will present a few tips for a specific type of Drive Test: quality routes.
Download
To download for free the files from this tutorial, click here:
telecomhall_tips_Create+and+Edit+Drive+Test+Routes+in+Google+Earth.zip (4.5 KB)
Definition of Quality Routes
Quality routes are pre-defined pathways, and that must be performed periodically, usually 2 to 2 months.
These routes should cover the relevant areas of the network, such as large customers and companies, bridges and major Avenues, etc.
Long ago, these routes were marked in printed maps, and delivered to the staff responsible for perform the Drive Test.
Currently it is more common the creation and use of these routes in vector files, lines drawn on GIS programs such as Mapinfo and Google Earth.
As an example, via Google Earth, we can use the ‘Add Path’ button, and build our path, the path we want for the quality route. (To simplify our example, our route here will be pretty simple).
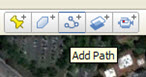

We navigate until our region of interest, and after doing some edits, our route is ready to be sent to the test drive execution team.
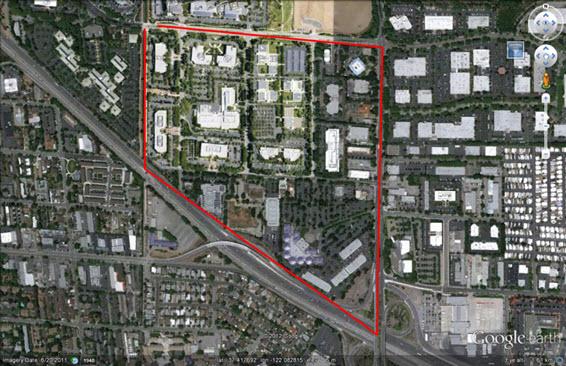
However, even on that route so simple, we can make some comments, or improvements.
First, we must remember that the routes will be travelled by people, who do not always know the region with details. This includes knowing the direction, points of departure and arrival, etc.
In addition, routes can be travelled by different people, from time to time.
Another important point: perhaps the desired route, exactly the way it was designed, may not be possible to be travelled.
The ideal is to have these routes perfectly defined, taking into account the criteria mentioned above. So you do not need to repeat the recommendations for each new performer.
And how to do this?
The best way to define Drive Test routes is drawing the same observing all existing conditions. In other words, plot the routes so that is really what we’ll find in the road.
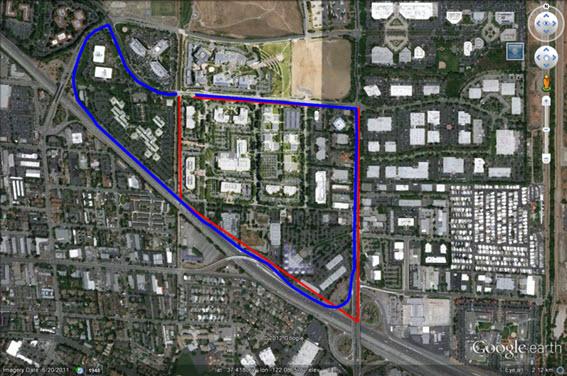
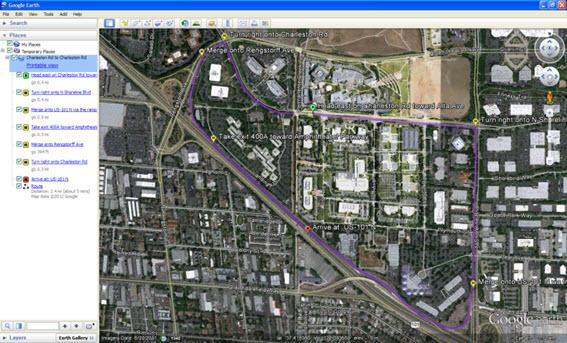
The route that we use as example allows us to see clearly what this means.
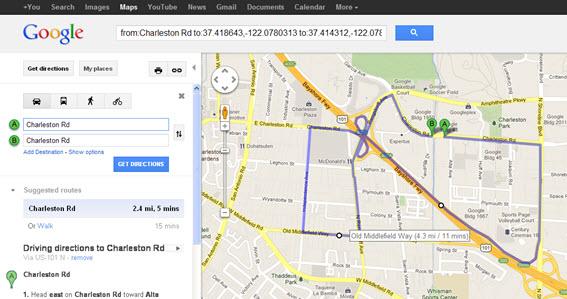
In ‘red’ we have the ‘original’ route, which was designed according to our needs. And in ‘blue’, the ‘possible’ route, driving by allowed roads. This is a route ‘validated’ by Google Maps routes.
But how to draw this type of route with accuracy?
Although Google Earth does not allow editing routes, we can do this using Google Maps!
Once set (and adjusted) the route on Google Maps, we can save it as a ‘kml’ file, and use it later in our work in Google Earth.
Creating a route in Google Maps
Next, we’ll demonstrate how the route above was created in Google Maps, and also how this final adjusted route was saved as a ‘kml’ file to be used in Google Earth.
The key information here is that Google Maps allows dynamic adjustment of drawn routes, making automatic correction of directions to the new ‘allowed’ points.
To do so, simply move the mouse over any point on the route, and so appear a small circle, move it to the new desired intermediate point.
But let’s go, and see how we made this route.
First, visit Google Maps:
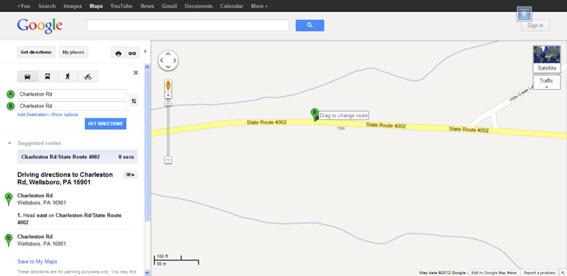
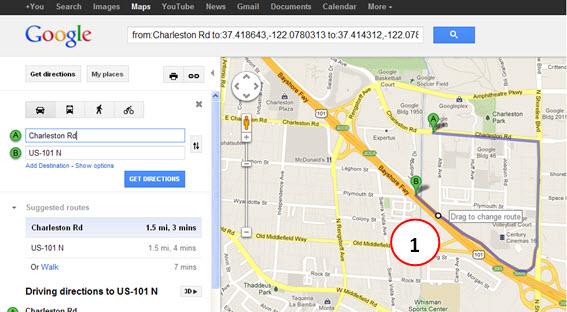
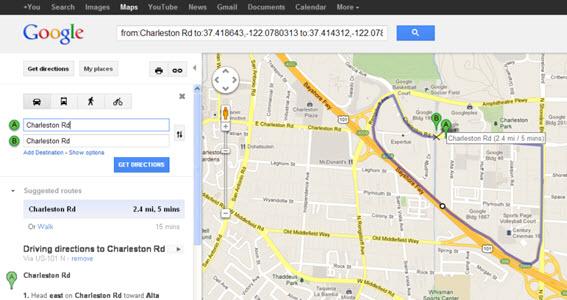
Continuing, we typed an address from our route, for example where we want to start - ‘A’ point. Then we typed the same address as a point ‘B’, and finally click on the ‘Get Directions’ button.
We have then a first ‘route’, from point ‘A’ to point ‘B’ – which for the moment is the same point.
Note: Yes, you can type the same address, as we’ll change the end point ‘B’.
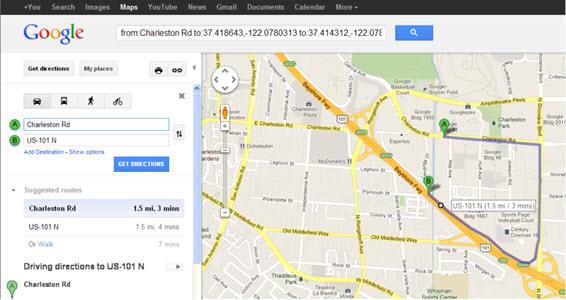
Then, continuing we click in point ‘B’, and we drag it in the direction of our desired route.
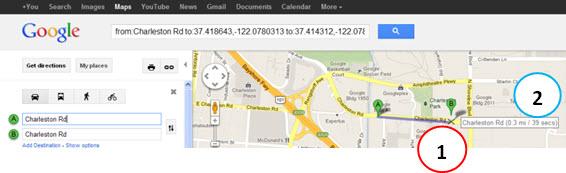
As you move the point, an ‘X’ (1) shows where it can be released, that is, where will the temporary endpoint be. We also have dynamic information with information of it (2).
Depending on your route, you can go by dragging the point to a location farther at route, and Google Maps will automatically be recalculating it, also indicating on the map.
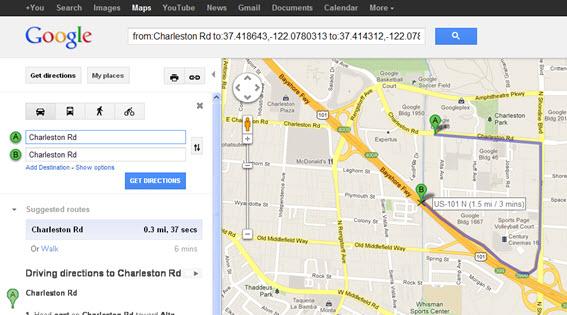
But if you drag too far, the route will be ‘recalculated’ for the best possible route – the best route to drive from one point to another. However, this may not be our goal, because we want the route passing through places that we chose.
For example, if you drag the point too far, the route may differ too much from the objective.
The solution?
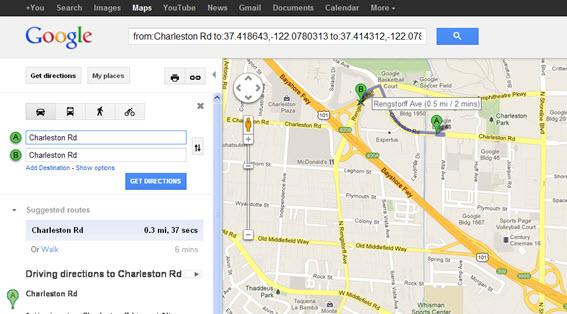
To solve this problem, and be able to set the route for specific points, we drag the end point ‘B’ to a point where the route still follow what we want.
Temporarily dropping point ‘B’, we pass the mouse over the route (at a point near it). At this time, there is a small white circle (1), indicating that we can ‘Drag’ the route to modify it (edit).
In our case, we are don’t want to edit the route, but we can use this gimmick to ‘force’ the Google Maps to include this point on our route. In order to not change the route, click and drag this point to another point – on the same route, and very close to where you moved your mouse and saw the circle.
Note that at this time, this crossing point is indicated also on the left side of the map (just like the small white circle on the map).
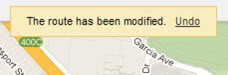
Note: when you insert a new crossing point, you have the option to undo. To do this, just click on ‘Undo’ at the top right of the map. If you don’t do so, you will no longer be able to remove it in edit mode (you can only remove it all). But don’t worry, an exit if you want to remove a point is drag it to a point that already exists.
Ok, now we drag point ‘B’ to a point near the starting point ‘A’, and our route is created.
Using the tips above, you can now create any customized route, adding how many intermediate points are necessary.
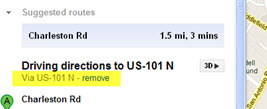
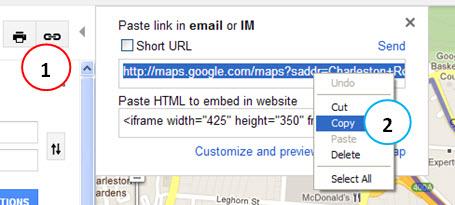
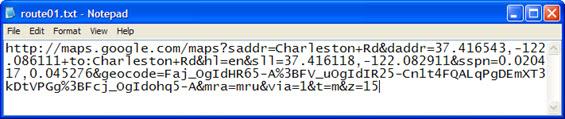
Once you have created a route, click on the ‘Link’ button (1), copy the URL (2) to the Clipboard and save to a text file.
Note: you can also edit the routes adding new destinations (point ‘c’, point ‘d’, etc.). If you want to use in this way, use the sidebar, which allows changing the order of items via ‘drag & drop’.
If you would like more information, watch the video:

Editing a route in Google Maps
To edit a route, the steps are the same as shown above: simply create and drag the new crossing points, from the desired points.

Again, note that the route is always automatically calculated, observing all existing variables like traffic. If you want to change, just as we saw above, inserting new crossing points.
Using the (saved) route in Google Earth
Fine, we already have our saved route in Google Maps (just paste the URL you copied in any browser). But to use our route in Google Earth, we need to save it as a ‘kml’ file.
To do this, the procedure is also simple: add text ‘&output=kml’ at the end of the URL.
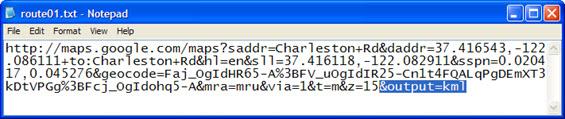
Paste this URL into a browser, press ‘Enter’, and the output is in the Google Earth format (kml).
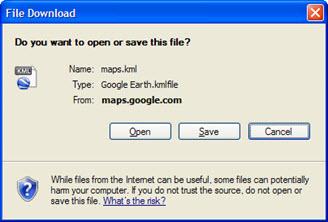
Save this route (kml file) in an appropriate location, and use according to your needs in Google Earth. Note: always keep the URL’s of their routes in text files, so when you need to change it just paste in Google Maps and go back to edit.
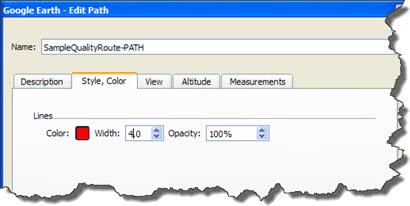
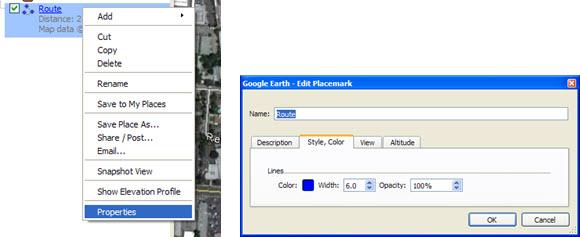
By right-clicking on the route, you still have the option to edit it, for example, change the color and opacity.
Done: your route is ready to be used!

Conclusion
This was a brief overview of how to create and edit routes on Google Maps and Google Earth.
We learn how simple is to create routes like professionals. Adding intermediate points, we have total control of the final form of our route.
In addition, the route generated (calculated) by Google Maps already takes into account local conditions such as traffic.
If you liked this tip, encourages us to continue bringing always the best content for enhance your work: share telecomHall with your friends!
And if possible, leave your comment, just below. Until our next meeting!