Introduction
When it comes to editing iamges we quickly remember of PhotoShop, CorelDraw and other established publishers in the market. I have no doubt that they are powerful, and do miracles, being necessary to the business of advertising and the like.
However, in our daily lives sometimes also requires some adjustments, which can be made. And the free graphics editor that comes closest to the publishers paid PhotoPlus is the SE, the Serif.
Image Editors
A happy reality among all the image editors (even Paint!) is that they all have their interface very similar, within the limits and objectives of each one.
This represents the following advantage: if you’ve used Photoshop for example, will have difficulty in using the PhotoPlus SE. There are the same concepts such as layers. The commands are also almost the same, even the icons. And the opposite is also true, that is, if you learn to use PhotoPlus SE, you can use without any problems any other editor.
But our goal is not to deepen the use of PhotoPlus SE, but use it only when we need it. We will show you step by step whenever you want, how to make using the PhotoPlus SE. Anyway, feel free to expand their studies, with readings of tutorials on the Internet.
Installation and License
Installation PhotoPlus SE is quite trivial, but you must register to use the product.
Download the installer from the Internet, and proceed with the default installation. When you start the program, will be asked to do the record. Follow the steps on the screen (enter your real e-mail), to generate a code that will be sent to your e-mail. Then check your e-mail to complete the licensing process.
Program Site: Affinity – Professional Creative Software

If the site has changed, do a Google search.
NOTE : The PhotoPlus SE is free, but there is a slightly more complete, paid. For our purposes, the free version is sufficient, it has all the key features we need.
An example of use: create image with transparent background
To illustrate the functionality of PhotoPlus SE, we will create an image with transparent background (Do You know how to do this?)
For this, the home page of the Site telecomHall, take a PrintScreen (copy the whole screen). Open Paint (Start → All Programs → Accessories → Paint) and paste (Edit → Paste). Adjust the screen until you have only the right tool Hunter. You will get something like the figure below.
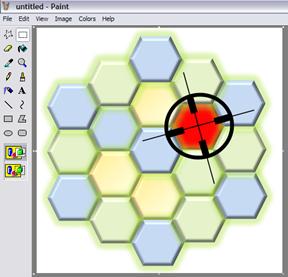
Save this image in any directory of your choice, as hunter_logo.bmp. Note that the background is white.
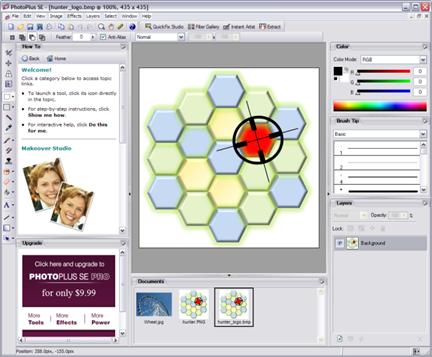
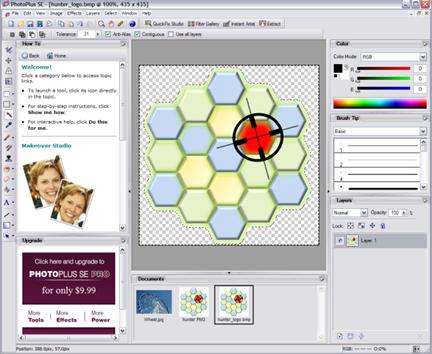
Start PhotoPlus SE and open this file (Menu: File → Open). Your screen should look like the figure below.
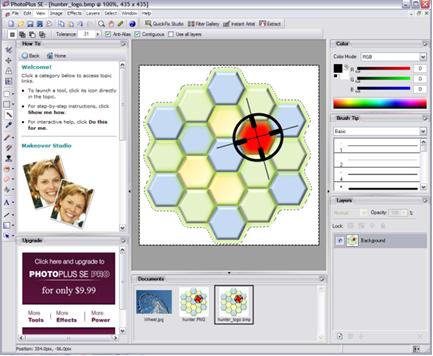
To make a color transparent - in this case white - we use the selection tool color (on the side of the main icons, is the seventh icon looks like a wand Magic: indeed, this is the name in some editors.) With this tool, select the picture the color you want, and press the Delete key.
It is important to note that if you just follow the steps above, nothing will happen. That’s because we’re still working with the image in the Bitmap format. To succeed, we need to create a layer.
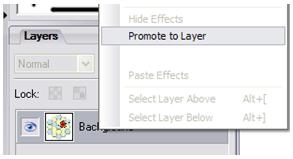
So, before selecting the color you want to change to transparent, we will promote our image of the background to layer. In the Layers tab, click the right-click and choose Promote Background to Layer.
And now, with the selection tool color, click on any white part of the image. Then press the Delete key.
The checkered white and gray color is transparent.
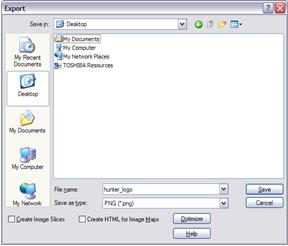
Finally, we now save the image. You must save in a format that supports transparency (bmp and jpeg for example do not support, and no good save in those formats). The gif and png support transparency, we use the png format.
Export the image hunter_logo.png. Menu: File → Export, choosing Save as Type as PNG (*. png).
Okay, you have a high quality image with transparent background
Other examples
There are numerous other examples and possibilities, the limit is your creativity. However, as mentioned in the beginning, our goal is not to create tutorials for image editing, but more quickly and get what we need.
Okay: This image editor is not complete. But its features perfectly free to attend, as we shall see where we need to make some adjustments to images.
Conclusion
This was a brief summary of the PhotoPlus SE software, the Serif. This is the software for editing images that we use whenever needed in our studies.
We hope you’ve enjoyed. If you have any doubts, find the answers posting your comments in the blog or via our support via chat or email.
Till our next meeting, and remember: Your success is our success!