Introduction
Hi folks, after some time away, I decided to return. ![]() Because Google Earth is one of my favorite program, it is fair that I restart the publication of new tips with it.
Because Google Earth is one of my favorite program, it is fair that I restart the publication of new tips with it.

So today we’ll see a very nice facility, and many people do not know - and does not use: Heights Profile!
First Tutorial - Important
Before proceeding: if you’re not familiar with Google Earth, or perhaps have not even installed yet, I strongly recommend that you read the first tutorial I wrote by clicking [here]:
Even if you already use, it is worth reading . I guarantee you will not regret it. ![]()
Heights Profile
But now let’s go to the tip of the week.
Well, as I said, the tip today is about Heights Profile. Okay, but what good? Well, the Heights Profile is very useful to check the height of oscillations between two points. Speaking more to our language: to verify the possible obstructions to a link.
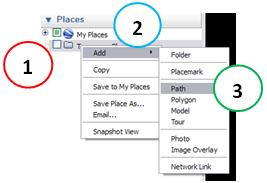
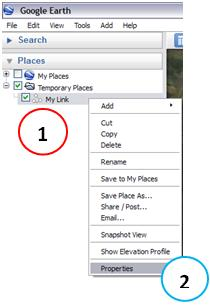
To use the Height Profiles, the first thing to do is create a path. For that, one way is to click with mouse right button in the Temporary Places Folder (1) → Add (2) → Path (3).
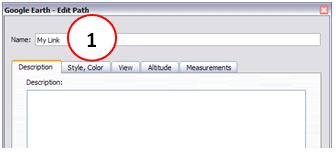
Then type a name for your path, for example My Link (1). Click the OK button.
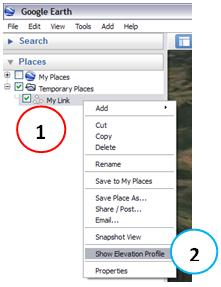
Done. Note that the link ‘My Link’ is now available in the left pane (1). Right click on it and choose Show Elevation Profile (2).
Voila! There’s your Heights Profile (1)! Simpler than you thought, isn’t it? ![]()
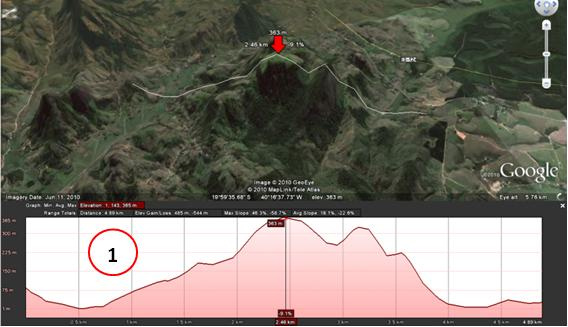
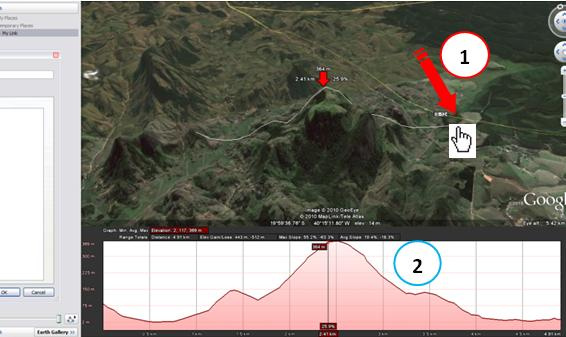
Note that when you move your mouse over the Heights Profile to the left or right (1), a red arrow (2) also moves along its path, with the information corresponding height and distance.
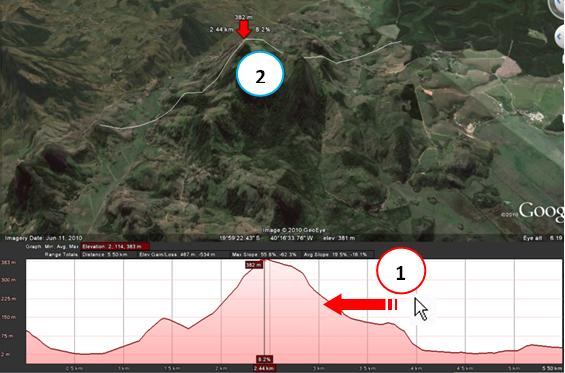
Now, if you click and drag the mouse on the Heights Profile, the corresponding passage dims (1) and is painted red in the corresponding path (2).

See that on top of Heights Profile you have a lot of important information about the link, as the total distance of your way, and the minimum, maximum and average height.
![]()
A bit further
Well, the tip was good, wasn’t it? But what if we go a bit further?
I’ll show you how you can have a dynamic Heights Profile! That’s right, you move the mouse, and the profile will be updating. So you can keep adjusting to do your specific job.
For that, click again on your way except with the right mouse button (1). But now choose Properties (2).
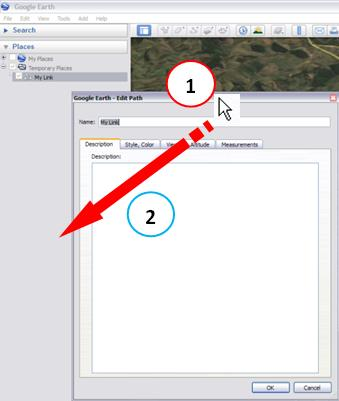
See now the dialog is in front, and hinders the full picture of the desktop. But our trick to work - a dynamic profile - this box must be active. So the only way I found is to drag it to one side, where it don’t stand in front of anything. Click on the title bar of the dialog box (1), and drag to the side as shown (2).
With the Properties dialog box still open - just dragged to a corner outside the viewing area (1), click on one end of your path (2) - when the mouse symbol turns into a hand - and drag.
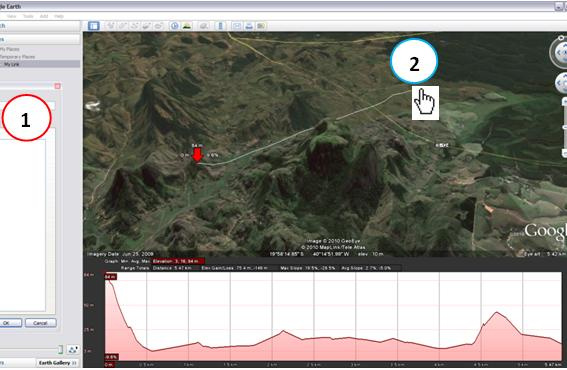
Notice that as you move the mouse (1), the profile will be updating (2).
Conclusion
Well folks, that’s it for today. Hope you liked it, and I promise to return soon with more tips to facilitate our work in the area of IT & Telecom.
I hope you’ve enjoyed. If you have any doubts, find the answers posting your comments in the blog or via chat or email.
Till our next meeting, and remember: Your success is our success!